Showing posts with label windows. Show all posts

Thursday, April 3, 2014

Thoughts and Opinions on Windows 8.1

I've been using Windows 8.1 for a few months now, after opting to use the new operating system for my new PC, despite my initial hesitation. Since the launch of Windows 8, there has been a lot of negative feedback from the community, primarily from desktop users feeling left out in the cold after Microsoft's shift in focus to a mobile/touch centric UI. With the release of Windows 8.1, Microsoft made some concessions towards desktop users and with the imminent release of the 8.1 Update, it appears as though they'll be making a lot more. So, before the 8.1 Update is released, I thought I should finally get around to publishing my experiences with Windows 8.1 as it currently stands.

Modern UI

Let's get this out of the way first. The Modern UI (née Metro) seems to be the biggest bugbear for those who have criticised the OS. I'm not going to lie, there are some real problems I've found when working with the UI daily, but I'll highlight some positives first.

  • I prefer the welcome/log in screen in Windows 8 to previous versions. The full screen graphic that changes depending on the theme of the last user to have logged in is a nice touch.
  • When first reading about Windows 8, I thought I would hate the Start Screen, however I actually find it's a more visually pleasing way to have quick access to applications I use regularly. For programs that aren't pinned to it, all I need to do is start typing the name until it appears in the search results on the right hand side of the screen, which is actually very similar to how I used the "classic" start menu in Windows 7. The live tiles make for a great idling screen, especially after I was introduced to the Steam Tiles application; I can have live tiles for my favourite games, displaying my achievements. However, I don't spend a great deal of time looking at it when I use the machine; most of my time is spent on the desktop.

  • I like the visual design of the Modern UI and the OS, for example, I find the Facebook application much more pleasant to use than the website; it's far less cluttered! Outside of the Modern UI (using the traditional desktop environment) I think the styling of UI elements (like window borders) also feels a lot cleaner.

Now, the negative aspects, and I apologise if I'm repeating a lot of the criticisms levied against the OS:

  • There is a distinct clash between the Modern UI and the traditional desktop environment, not just in style, but user experience too. For example, some actions on the desktop will result in a Modern application launching and taking over the whole screen, which is very disconcerting.
  • Following on from the last point, it's frustrating that Modern apps can only be used either in full screen or half a screen. This sort of interface restriction would probably feel right at home on a touch screen device, but it's a poor alternative to a truly windowed application. It's just about acceptable on my three displays, where I can relegate the Facebook or Evernote applications to half of one screen, but I could imagine working with a single display that this would get tiring very quickly.
  • The "hot corners" for accessing the "Charms" menu or the task switcher were initially a nightmare to use with multiple displays. For example, if I wanted to access the Charms menu on the middle display, I have to move the mouse pointer into the top right hand corner. However, I would occasionally overshoot it, resulting in the activation of the task switcher on the right display, which then locks the pointer to that screen. While I don't use the hot corners all that often, I have discovered a reliable method for accessing them when necessary: approaching the corner by first moving the mouse pointer to the top of the relevant screen, then horizontally across. So far, this has worked every time I've tried it.
  • Shutting down the system is problem area that has been slightly improved with Windows 8.1. With the original release of Windows 8, you had to use the Settings Charms menu to access the shutdown/restart options. With the return of the Start button in 8.1, you are able to right click it to access a raft of useful shortcuts, shutting down and restarting included. Of course, it's worth mentioning that with modern PCs, it has been possible for some time now to initiate a graceful shut down via the power button on the case thanks to ACPI.

I have managed to get used to the foibles mentioned above, even discovering workarounds or new ways to interface with the system in some cases, but I do believe I'm a special case (or so I've been told... heh). I have worked with many different GUIs over the years (Windows 3.11 through 8, OS X, Gnome 2 and 3, Unity, KDE, XFCE; the list goes on), so I feel I'm more suited to adapting to strange new UIs. However, I'm not sure about the rest of the population. Maybe the update to Windows 8.1 that's due in the coming months will help; there are supposedly changes to the UI that allow Modern applications to better coexist with the Desktop.

OS Functionality and Behaviour

Now I'll move on to other points of interest, both in terms of OS features and some issues I've experienced relating to my specific set up.

  • I really like the new Task Manager; it's far superior to previous iterations. CPU, memory, disk and network usage are visible, with elements being highlighted by changing colours to depict different levels of utilisation (red being high). In addition, the process list forms more of a tree, to visualise the different processes spawned by each application running.

  • I was impressed with how many devices the OS recognised before I had installed any drivers myself. Specifically, having the network adaptor working is extremely useful. This might just have been because Asus built the motherboard using well supported NIC, but either way it made getting the rest of the system set up much easier.
  • There's so much more out-of-the-box functionality; for example: more audio and video codecs/formats are supported and there's a built in PDF reader. However, all the support is achieved via Modern applications, so by default when I click a supported file, the relevant Modern application is launched. As mentioned before, this takes over an entire screen, which is a jarring experience if you just want to preview a photo. I have since switched the file associations so that this doesn't happen; for example using the old Windows Photo Viewer instead of the newer Photos app.
  • I had some issues with the operating system's Fast Boot feature. I noticed that the Event Viewer had some "unexpected shutdown" errors, despite my always having properly shut down the computer. This culminated in the OS eventually deciding to perform a run of chkdsk at boot, which was the final straw. I ended up disabling Windows 8's "Fast Startup" feature and the offending log entries disappeared. I can't say I've noticed much of a difference to boot times either.
  • Search, in it's default configuration isn't particularly helpful. Previously, in Windows 7 you could search for applications, files and folders simply by accessing the Start menu and beginning to type; results would begin to appear the moment the first key was pressed. I haven't found a way to mimic this behaviour in Windows 8.1; the best I can do is simply to disable the Bing integration. Another problem I had with search was it doesn't seem to actually find any of my documents; I may have to tweak the indexing configuration, but I'm shocked that nothing ever appears.
  • Microsoft need to work on the OS updates system. I always configure Windows to simply notify me about updates so I can download and install them at my convenience; the last thing you need while playing an FPS online is your system to start downloading, let alone install, updates! The problem I find in Windows 8.1 is the only time I'm notified of the updates is at the login screen; there is no little notification in the system tray on the desktop, nor any option to install them when I shut down my PC. This has resulted in me not applying critical updates for several days after release; not good. Other sources have informed me that if you have the operating system automatically apply updates, it will force a reboot with no option of delaying it, which would be far more frustrating experience. I feel like this would be easy enough to fix; all Microsoft would need to do is implement system tray notifications again.
  • Windows backup has changed; there is no longer any way within the UI to schedule a system image backup. It is possible to manually create one, but scheduling requires a manual step to add the relevant command to "Scheduled Tasks".
  • One of the great features of UNIX-based operating systems is the ease at which user data can be stored on a different file system to your operating system; you simply mount a volume at /home. In Windows, the simplest way to achieve a similar arrangement is to move the user data and symlink to it. It's worth noting that the "proper" method to move each individual user directory as it's created (e.g. C:\Users\peter_000) and not the top-level C:\Users directory; the latter can cause problems with system upgrades later on.
  • After a reboot, the Corsair Link software failed to find my H80i, despite being connected to a powered USB port (via the NZXT IU01). After some searching, I found a guide suggesting some registry edits that would solve this issue. The problem appears to be related to new power management techniques Windows 8.1 tries to employ with connected USB devices. Sure enough, once I had followed the guide, I was able to manage my H80i again.
  • During the installation of Steam, the progress indicator hung at "Creating Shortcut"; I was simply able to kill the installer and start Steam as normal.
  • The utility I use for controlling my graphics card, Sapphire Trixx, will eventually crash after a few hours of running in the background. No error is thrown, it just becomes unresponsive, which results in Windows ending the process.

With all the points of contention I have with the OS, you might be surprised to hear I'm actually finding it an OK experience to work and play with. After I'd spent the time customising the Start Screen to my liking, installed all my necessary applications and switched my user account to drop me to the desktop at log in, it felt just as much a home to me as my Windows 7 environments do. I'm looking forward to the improvements that the 8.1 Update will bring; it seems to be addressing some of the issues I've outlined above with the Modern UI. I eagerly await the next Patch Tuesday!

Monday, February 3, 2014

DayZ Me Rollin', Dey Hating - DayZ Commander without Admin Privileges

I arrived on the DayZ scene rather late; PC Gamer had been talking about the famous Arma 2 mod for months by the time I got around to playing it. In fact, it was only when the mod became a distinct title to install via Steam for owners of Arma 2: Combined Operations that I took the plunge.

Running DayZ through Steam is a cinch, however you only get access to the vanilla mod. In fairness, there's still a lot of fun to be had playing vanilla DayZ; I have clocked up 77 hours playing it according to my Steam profile. I know my friends have played for even longer and between us all we've had many amazing and terrifying experiences.

Vanilla is plenty of fun, but I have been watching YouTube videos and Twitch streams of other players, which made me aware of the many mods of the mod; Day Zero, Epoch, Namalsk, for example. Some of these mods simply fixed a few issues with the standard mod, others added whole new functionality such as base building, while others brought new maps to the experience.

Installing any of the mods isn't a trivial process, but then neither was DayZ itself originally. However, even before the vanilla mod was available through Steam, there was a tool that simplified the whole process.

DayZ Commander

I had my first experience with DayZ Commander a few months ago and I had unfortunately been put off using it for two reasons:

  • The download page itself was a mess of unrelated download links for software I didn't want and the installer itself was packaged with various third party pieces of bloatware. There was a tiny link to a version of the installer that was free of anything unnecessary, but it was a bad first impression. However, I have visited the tool's homepage again recently, and things are better; the download page is far easier to navigate, the default download link points to a clean installer and there was even a post from the developer apologising for going down that dark path (which I can't seem to find to link to any more).
  • The application required administrative rights to run. Many people that I mention this to are nonplussed by this requirement, especially the large number of people who are using an administrator account for their day to day computer use. I'm not going to go into detail here explaining why that's a bad idea, that's a topic for a whole other post, but suffice to say; this exposes yourself to additional and unnecessary risk.

The download/installer issue didn't put me off by itself, but the requirement that the tool run with admin privileges was a show stopper for me. After searching online for information why this might be necessary, I happened across a discussion on the DayZ Commander Google group from 2012. In the conversation thread, the tool's author states this requirement is a legacy hangup from when he originally wrote it, and mentions that this is something he'd like to review. Clearly, this hasn't happened yet, but I was intrigued to see a response from a user who had written a utility that would remove the administrative requirements, for which a download link was provided.

As well intentioned as that helpful user may have been, I'm not keen on downloading random executables (I'm quite a paranoid user, as you may have guessed by now). However, it did lead me to think how does somebody go about changing a binary in this fashion?

Windows SDK

It turns out that executable files tend to have a manifest containing metadata required by the OS to correctly run the program. The manifest itself is an XML document, and part of it can be used to specify the privilege level required by the application:

<requestedPrivileges xmlns="urn:schemas-microsoft-com:asm.v3">
  <requestedExecutionLevel level="requireAdministrator" uiAccess="false" />
</requestedPrivileges>

You can probably tell the above snippet tells Windows that the executable requires admin rights in order to run. Changing this XML requires the use of a command line tool from the Windows SDK: mt.exe.

Installing the SDK is a simple enough process; just grab the relevant installer directly from Microsoft. During the installation, you need to select the ".NET Development -> Tools" component in order to have mt.exe available to you.

Finally, the Solution

Before we start, it's worth noting the following preconditions that you will have to ensure are met before attempting the solution. The process may work if you don't, however, I have only tested the solution with given this system state:

  • To get myself started, I followed the instructions I found for working with DayZ Commander and Steam on the Steam community forums. However, I did not perform step 3c; running the Arma executables as an administrator.
  • To clarify, I only installed Arma 2 and Arma 2: Operation Arrowhead via Steam, not the Operation Arrowhead Beta or the DayZ Mod (DayZ Commander manages these for you).
  • Install DayZ Commander only for the limited user account you play games as, instead of for all users of the system. For me, this allowed the modified tool to work properly. I suspect the issue I had when I installed for all users was down to folder permissions. Maybe changing them would fix the problem, I haven't tried yet.

So, assuming the above criteria are met (or you're happy to try anyway), here's my step-by-step guide to stripping the admin requirements from the DayZ Commander binary:

  1. Install the Windows SDK, making sure you select the ".NET Development -> Tools" component when asked:


    NB: I already had the Debugging Tools for Windows installed, hence the reason it's selected (and greyed out) in the above example. It's a useful set of tools to have, especially if you want to debug BSOD crash dumps, so feel free to include it yourself.

  2. Install DayZ Commander, choosing the option to only make the program available to your own user. This will install the application into your user's home directory, at a location similar to the following (substitute "peter_000" for your own user directory):

    C:\Users\peter_000\AppData\Local\Apps\Dotjosh Studios\DayZ Commander

  3. Make a backup of the executable by copying it to another directory. The binary is called DayZCommander.exe and can be found in the Current directory from the installation path mentioned previously.

  4. Open an instance of command prompt.

  5. Navigate to the directory where the mt.exe tool is located. This depends on which version of the SDK you installed, but it should be something similar to:

    C:\Program Files (x86)\Windows Kits\8.1\bin\x86

  6. Use mt.exe to export the manifest (remember to adjust for your different installation path and output location if necessary):

    mt -inputresource:"C:\Users\peter_000\AppData\Local\Apps\Dotjosh Studios\DayZ Commander\Current\DayZCommander.exe;#1" -out:D:\tmp\extracted.manifest

  7. Open the resulting file and search for the following line:

    <requestedExecutionLevel level="requireAdministrator" uiAccess="false" />

    NB: I had to find the second instance of this line, as the first was present in a comment section of the document.

  8. Change the line so it reads as follows:

    <requestedExecutionLevel level="asInvoker" uiAccess="false" />

  9. Save the updated manifest.

  10. Us the mt.exe utility to overwrite the manifest embedded in the DayZ Commander binary with the one you modified in the previous step (again, update paths as necessary):

    mt -manifest D:\tmp\extracted.manifest -outputresource:"C:\Users\peter_000\AppData\Local\Apps\Dotjosh Studios\DayZ Commander\Current\DayZCommander.exe;#1"

    When I performed this step, I instantly could tell the change had worked because the small shield icon that denotes an executable will require admin privileges disappeared from the DayZ Commander.exe.

  11. Run DayZ Commander to check it no longer prompts you for admin privileges. However, it's worth noting that when using the tool to update the Arma 2: Operation Arrowhead binary, you will need to provide them.

Hopefully this gives those of you out there that are as paranoid as myself the peace of mind to install and use the DayZ Commander tool. I'm happy to report that I've been using it for a few weeks now without any problems.

Saturday, April 13, 2013

Tri-Boot Refresh - Mountain Lion, Windows 8 and Fedora 18

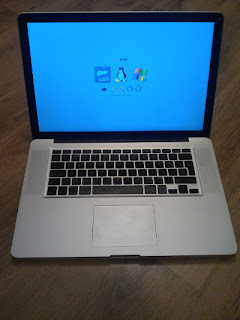
This post has been a long time coming. Over the course of several months I spent the odd morning here and there attempting to build a new tri-boot machine for myself. My previous machine was still running Snow Leopard, Windows 7 and Fedora 14 and in dire need of upgrading. However, I was certain that an upgrade of OS X would destroy my carefully constructed partition table, which is why I opted to build a new machine so as to be able to continue to do my job!

Now, you might be wondering why it took so long for me to implement such a system, especially as I had already been through the process once before. The delay was caused by my initial insistence on a pure EFI/GPT booting solution; I wanted all three operating systems to boot via EFI and not rely on the Mac's hybrid GPT/MSDOS partition table and legacy boot options.

The main problem that I continually encountered was successfully booting Windows 8 via EFI. I tried several methods of installing the Microsoft OS, all of which failed to produce a bootable system:

  • Booting directly off the DVD (by holding down although and selecting the "EFI" option). This resulted in the screen blanking and a spontaneous reboot before the installer even fully loaded.
  • Following a well documented process that involved partitioning the disk using a WinPE environment and installing Windows via the dism tool that's distributed as part of the Microsoft Automated Deployment Kit. While this bypassed the initial Windows Setup step routine, I still experienced a similar issue; the screen blanked, the system rebooted and booting off the Windows partition again resulted in the following message:

    The computer restarted unexpectedly or encountered and unexpected error. Windows installation cannot proceed. To install Windows, click "OK" to restart the computer, and the restart installation.

    Grabbing the minidump from the partition and parsing it through the WinDBG tool pointed the finger at the Intel integrated GPU driver igdkmd64.sys.
  • After the above discovery, I tried tweaking hardware prior to booting the operating system by issuing commands in the EFI shell provided by rEFIt. Specifically, to try and force the Nvidia GPU to be active during the initial boot. This got me a little further through the install process, but still eventually resulted in a system crash caused by the igdkmd64.sys.
  • As a final attempt, I followed a suggestion to strip out the integrated graphics drivers after deploying the OS image. However, this also proved unsuccessful, even when combining this method with the previous technique of modifying the hardware settings via EFI shell.

Even after all the above failures, I was still keen to get this triple boot implementation working, but I was finally convinced to let the idea drop when I read some notes from people who stated that audio was known not to work with Windows instances booting via EFI. Given that my primary reason for having a system that boots Windows was to play games, it would have been terrible to sacrifice audio for the sake of possible faster boot times!

The Installation Process

After I made the decision to resort to the hybrid GPT/msdos partition table method, installation was much the same as before, with a couple of extra steps to carry out during the Linux install. I'll do my best to detail the process here, in case there are any brave souls out there willing to give it a go! I shouldn't have to say this, but this is a destructive process, so be sure to back up anything important first and be aware that your mileage may very, depending on the Apple hardware you're using (my current machine is a MacBook Pro 6,2)

  1. Boot from the OS X installation media and use Disk Utility to create the following partition scheme (these sizes can obviously be varied, depending on your priorities):
    1. Size: 80GB, label: "OS X", FS Type: HFS+, journaled, case sensitive (my personal preference, the default is case insensitive)
    2. Size: 250GB, label: "WINDOWS", FS Type: msdos
    3. Size: 1.07GB (the smallest sized partition the GUI driven Disk Utility tool is able to create), label "BOOT", FS type: msdos
    4. Size: 20GB, label: "ROOT", FS type: msdos
    5. Size: 229GB (the remaining space), label: "LVM", FS type: msdos
  2. Exit Disk Utility and begin the installation, selecting the OS X partition when prompted.
  3. A dialog box will appear warning that the File Vault (probably the Full Disk Encryption mode)and the Recovery Mode will not be available; probably due to the installer not wanting to trash the complex partition scheme. Confirm you're happy to live without these features to continue the installation routine.
  4. Once OS X installed, install the rEFIt bootloader to facilitate booting the other operating systems and their installers. NB: it might take a reboot or two for the bootloader to appear.
  5. Insert the Windows 8 DVD and reboot the machine.
  6. Boot off Win 8 DVD by CD/DVD labelled "Windows". This boots the installer using the legacy/BIOS mode of the Mac.
  7. Now, it may be possible at this point to follow the usual Windows installation routine; answering questions as prompted and clicking next. However, due to all the problems I had with trusting installation Wizards, I opted to hit Fn-shift-F10 to spawn a command prompt and perform the installation manually. Technically, just shift-F10 is the necessary key-combination to bring up a command prompt, but on a Mac the function keys are by default bound to other specific purposes (volume control, screen brightness, etc.), so using the Fn (or function) key is necessary to access the regular function keys.
    1. Run Microsoft's command line partitioning tool: diskpart
    2. To be sure of the installation drive, list the available disks: list disk
    3. Select the destination drive (usually disk 0): select disk 0
    4. List the available partitions to be sure the intended destination: list partition
    5. Select the destination partition (in this case, it should be number 3): select partition 3
    6. Format the partition as NTFS: format quick fs=ntfs label=Windows
    7. Exit the partition tool: exit
    8. Change directory to the root of the X: drive. This is necessary to access the version of the Dism tool that can apply the OS image: cd \
    9. Run the Dism tool to apply the Windows 8 image (in this case, the Professional edition):
      dism /apply-image /imagefile:d:\sources\install.wim /index:1 /applydir:c:\
    10. Change directory to the root of the new installation: c:
    11. Configure the Windows boot loader: bcdboot c:\Windows /l en-gb /s c:
    12. Exit/close the command prompt.
    13. Exit/close the Windows installer, which results in the Mac rebooting.
  8. Select the icon of the Windows logo to boot into the OS and finalise the installation as per usual (configuring user accounts, etc.).
  9. Eject the Windows DVD and insert the Fedora DVD.
  10. Reboot.
  11. Select the CD/DVD icon.
  12. Once the installer has completed booting, switch to an alternative virtual console by pressing Fn+ctrl+alt+F3, as it is necessary to create the layout of your LVM volumes before continuing with the installer:
    1. Launch the LVM tool: lvm
    2. Designate the last partition on the disk as an LVM Physical Volume (PV): pvcreate /dev/sda6
    3. Create a volume group: vgcreate vg_fedora /dev/sda6
    4. Create a volume for the /tmp file system: lvcreate -L 1G -n tmp vg_fedora
    5. Create a volume for the /var file system: lvcreate -L 1G -n var vg_fedora
    6. Create a volume for the /home file system: lvcreate -L 1G -n home vg_fedora
    7. Exit the tool and return to the installer by pressing the keys Fn+alt+F7.
  13. Proceed as normal through the installation, using the previously created 20GB partition for the root (/) volume and LVM volumes for their respective mount points. One very important note: when selecting the disk for installation, be sure to not install a bootloader, as per the instructions in the Fedora manual. During my initial attempts, this would always fail and prevent the installation from completing successfully; it needs to be carried out manually post-install.
  14. Once the installer completes, allow it to reboot the system.
  15. Select the CD/DVD icon.
  16. At the Linux boot prompt, navigate to and select the rescue system option.
  17. Let the rescue system boot, detect and mount the installed instance of Fedora.
  18. Select the shell option to be dropped to the command line.
  19. Change root to the mounted install: chroot /mnt/sysimage
  20. Generate a GRUB configuration: grub-mkconfig -o /boot/grub/grub.cfg
  21. Install GRUB to the HDDs boot sector: grub2-install --recheck /dev/sda
  22. Reboot and select the penguin icon to boot into Fedora and complete the initial setup of the OS.

If you've managed to follow all these steps, hopefully you're lucky enough to possess a triple boot machine! Some noteworthy points about the the above steps and the setup as a whole are as follows:

  • If you run into a situation where either Windows or Fedora will not boot, it may be necessary to run the rEFIt sync tool. When booting it's one of the options below the available operating systems and it repairs the hybrid partition table after the use of a partitioning tool that's not aware of it's existence.
  • After installing Fedora, trying to boot Windows via rEFIt will result in the GRUB bootloader appearing! However, the Windows install is an option here, simply select it to boot the OS.
  • I found out about how to manually install GRUB by following steps I found on the Arch Linux wiki.

Feel free to sound off in the comments if you have anything to add, or you've tried the process yourself and hit a snag, I'd be happy to try and help.

Sunday, June 10, 2012

Post Upgrade Woes - Part 2: Spontaneous Reboots

After running into an initially scary but simple to fix problem following the recent(ish) GPU upgrade I performed, the PC was subjected to it's usual routine as the house work-horse; a bit of web-browsing, photo editing/curating, primary school teacher planning and resource creation, and plenty of gaming! In fact, the machine was subjected to some fairly lengthy Skyrim sessions post-upgrade; check out some of my screen caps for an idea of how amazing it looked!

Over the course of a Saturday, the machine had been left idling; both my own account and that of my fiancée were logged in, with her account the currently visible session. I happened to notice that the PC was displaying the Windows Welcome/Log in screen, neither of our accounts displaying the "currently logged in" message, which was strange. Remembering the previous issue and fearing a spontaneous reboot, I checked the Windows Event Viewer.

As I had feared, the machine had experienced a BSOD and rebooted, however, this time with a different error than before:


The computer has rebooted from a bugcheck. The bugcheck was: 0x00000124 (0x0000000000000000, 0xfffffa8004d90038, 0x0000000000000000, 0x0000000000000000). A dump was saved in: C:\Windows\Minidump\032512-15288-01.dmp. Report Id: 032512-15288-01.


What I found particularly concerning was that despite having configured Windows to not reboot automatically following a BSOD. A brief search online only compounded my fears of a hardware issue. Some possible causes given were:

  • Possible memory issues.
  • Power issues - either incorrectly configured voltages or instabilities in the supply.
  • Overheating.
  • Pretty much any piece of hardware in the system(!)

To rule out a problem with the system's RAM and CPU, I immediately decided to perform an extended run of MemTest86+, followed by Prime95's small fast Fourier Transform torture test; both ran for several hours without any problems. So, I dug further into the Event Viewer and found a message that revealed a bit more info:


A fatal hardware error has occurred.

Component: AMD Northbridge
Error Source: Machine Check Exception
Error Type: HyperTransport Watchdog Timeout Error
Processor ID: 0


The HyperTransport bus has been used in AMD CPU design since the introduction of the AMD64 architecture, and replaces the old Front-Side Bus used previously. It provides a channel, separate from the memory bus, for the CPU to carry out I/O operations on the various other pieces of hardware that make up a modern PC, in particular, those on the PCI, AGP or PCIe buses (there's a great explanation of the HyperTransport bus over on Hardware Secrets for those interested). Since I had just upgraded my graphics card, my first thought was that there was in fact an issue with the GPU itself.

To try and confirm my suspicions, I opened the minidump file referenced in the system events and performed some basic analysis. This proved fruitless, however, because it seems that because the system was rebooting despite being configured to halt and perform a full crash dump, instead producing "minidumps". This meant that there was never enough information present in the dump for the Windows debugger tool to narrow the problem down to a particular driver.

I contacted the supplier, Overclockers.co.uk, mentioning the issue and they immediately issued an RMA. Because I hadn't really performed any troubleshooting myself and because the card was making mince-meat of most of the games I was throwing at it, I loathed the thought of simply returning it. Fortunately, Overclockers support team pointed out that I could take as much time as I wanted to try and diagnose the problem, my RMA would still be valid.

This offer proved to be most fortunate, as my attempts to replicate the issue were mostly unsuccessful. The problem did reoccur, but I was seemingly unable to create a situation where I was certain the BSOD would be triggered and indicate the root cause. Over several weeks, I made several re-adjustments to my system to try and isolate the problem:

  • Reset the BIOS settings to their defaults.
  • To completely ensure there were no outstanding driver issues (the previously mentioned problem was caused by such a conflict), I performed a fresh re-install of Windows.
  • Switched the Corsair VX550W PSU back to the Enermax NoiseTaker EG701AX-VE W previously installed. Despite this not fixing the issue, I left he older supply installed after I used an online tool to check the suitability of the Corsair PSU against my current system spec. Choosing to allow for 10 USB devices and a small amount of overclocking headroom, the results suggested I would need a PSU capable of outputting 581W. Even adjusting the calculator for only 4 USB devices, the suggested PSU was 560W, still more than the 550W Corsair model could output.

None of these changes resolved the issue and so I decided to ship the GPU back to Overclockers; I had run out of troubleshooting options and I wanted their opinion on the GPU's stability. Even if they found no problem with the GPU, I would have the piece of mind that someone with a superior testing suite could confirm the card to be OK. I provided them with the troubleshooting steps I had undertaken and the following observations about the problem:

  • The issue only occurred when the system was idling, or at the most playing music.
  • There was no guarantee that leaving the system idle for any length of time would result in a reboot. In attempting to replicate the problem, I did not shut down or reboot the machine for over week and could not trigger a BSOD.
  • No matter how hard I pushed the system, whether in-game or using stress testing/benchmarking tools like FurMark and Unigine, the machine never rebooted or exhibited any strange behaviour of any kind.

After just a couple of days, I received the following response from the Overclockers team:

"Graphics card passes all Tests with no issues, Tests Run: Crysis WarHead, 3D Mark 11, Furmark, 3Dmark Vantage, AVP, Lost Planet 2, Stone Benchmark MSI Kombuster, Resident Evil Benchmark, ATI Mecha, ATI Ladybug, Streetfighter Benchmark, Stone Giant and heaven benchmark tool, these were all tested at 1920 x 1200 resolution running maximum settings, tested on DX9, DX10 and DX11 where applicable"

They were unable to find a fault the card when under load, which was to be expected. While this wasn't the problem I had been experiencing, I didn't expect them to spend weeks waiting for a BSOD to occur! Even if they had gone to such length, I honestly doubt they would have seen the issue occur; I suspect the problem is quite specific to my system's configuration.

Since my card was returned to me and it's been re-installed into my system, the issue hasn't re-surfaced. I'm hoping that the act of re-seating the card may have been enough to resolve the issue, but it's more likely that the particular condition that caused the reboot hasn't arisen yet. I have my fingers crossed for the former, however!

Wednesday, May 2, 2012

Post Upgrade Woes - Part 1: Display Corruption

As mentioned in my previous post, following my GPU upgrade, I experienced some odd behaviour. Strangely enough, the computer worked perfectly directly after the upgrade; I was even able to jump into a game of Skyrim (and be wowed with the massive increase in performance, I might add). However, when I logged into another account, strange artifacts appeared on screen, the screen flickered off and back on and, finally, the whole rig spontaneously rebooted!

Extremely worried there was an issue with the card, I logged back into my account; no artifacts appeared and I was able to run FurMark for an extended period without any problems. However, logging out and back into the secondary account immediately resulted in the same problem. After the machine rebooted again, I tried logging in as the "Admin" account I have configured; same problem. This time I was able to see a message briefly pop up on screen, which I later tracked down in the Event Viewer:

"Display driver stopped responding and has recovered"

Researching online brought up a host of reasons why this message might appear, but considering the issue only occurred in certain user accounts, I was fairly certain that some remnants of the previous card's drivers were causing the issue, and that running the driver installation in my user account had not cleared up other accounts on the system. To test my theory, I booted into safe mode, logged into the "Admin" account and used the msconfig tool to stop the AMD/ATI Catalyst Control Centre from starting when logging in. Sure enough, I was able to reboot and log into the "Admin" account with no problems at all.

After a bit more reading around I discovered a tool named "Driver Sweeper" that some people claimed to have helped them with similar problems. I'm very sceptical about installing any sort of 3rd party utilities on my machine; usually they don't uninstall properly, don't work, or you get more than you bargained for (i.e. ad/mal/spy-ware)! However, given the number of times the tool was referenced on forums, I decided to give it a go.

Once Driver Sweeper was installed, I executed a scan for video drivers and it located several files that I hadn't been aware of and even the installation files that are extracted to C:\ATI! After clearing away all the driver remnants, I rebooted and performed a fresh install of the AMD catalyst drivers in the "Admin" account, before rebooting and testing that I could log into each of the three accounts on the system without issue. This test proved successful, with no re-occurrence of the artifacts or rebooting, and I was safe to use the system normally again!

Wednesday, February 15, 2012

Resizing Partitions on a Windows 7/Vista Boot Drive

I used to find it possible to comfortably fit a Windows XP installation onto a volume as small as 20GB; the minimum specs even suggest 1.5GB would be sufficient, but I always allowed for some growth over the life of an install. With the release of Windows Vista, the minimum space required for the OS rose to 55GB; which is substantially larger! However, should you install Windows Vista (or 7, for that matter) onto such a small volume, you will quickly run into capacity issues; as I found with my first installs of the OS.

Now, my usual solution to a system suffering from this issue would be to re-partition the drive and re-install the OS. However, recently I found myself in a situation where I did not have the time to dedicate to a full system rebuild, so I decided to try and resize the existing partitions.

The system in question had two partitions on the drive; the system partition (C:), which was far too small, and the data partition (D:), which had an abundance of free space. This boiled the solution down to two steps:

  1. Shrink the second volume (D:) by moving the start of the partition further towards the end of the disk.
  2. Extend the first volume (C:) into the newly created space.

Despite Windows having it's own disk management tool, which supports both shrinking and growing volumes, I was unable to use this tool for the entire process for two reasons:

  • It only supports shrinking by moving the end of the partition. This would mean that shrinking the 2nd partition (D:) would result in the free space being at the end of the drive.
  • The Windows tool can only extend a regular partition into contiguous space; meaning that any space freed at the end of the drive would be useless, given the above limitation.

Fortunately, there are an abundance of 3rd party tools out there that are able to resize and move on partitions, as well as perform other useful operations. Partition Magic (discontinued) and Acronis Disk Director are popular commercial applications, for example. However, being an open-source aficionado, it's hardly appropriate that I use such proprietary solutions! Instead, I opted to use GParted, which is a GUI that sits on top of the parted command line utility. It's available to download as a bootable ISO image; perfect for manipulating a system's boot drive.

Although I was confident that GParted would be able to shrink the second partition, I had read several accounts online that suggest it wasn't the best tool for resizing Windows Vista/7 system partitions. While it appeared possible, it would be necessary to perform a repair of the operating system using the original installation media. This was something I wanted to avoid if possible, so I ended up using a combination of GParted and the Windows Disk Management tool.

The Resize: Step-by-Step

So, once I had downloaded the GParted ISO and burnt to a spare blank CD-ROM, I loaded it into the machine's optical drive and started my hybrid process:

  1. (Re)booted from the GParted CD-ROM.
  2. Used the GParted tool to configure a shrink/resize operation to be carried out on the second partition (D:) that would move the start of the partition further along the drive.
  3. Checked and confirmed the operations required to achieve the desired results, before instructing GParted to carry out the resize.
  4. Waited an hour or two until GParted had finished.
  5. Rebooted into Windows Vista (and checked to ensure the contents of drive D: were accessible).
  6. Used the Windows Disk Management tool to grow the system partition into the newly available space.

To perform a cursory check of the system, I rebooted the machine, forcing a run of chkdsk to ensure file system consistency on both partitions. I was very happy to see the checks run without any issues and the system boot successfully; I saved myself a lot of work re-installing the operating system.

Tuesday, November 1, 2011

Asinine AV "Alerts"

Being the "go-to" guy for most of my friends and family when they have a problem with their computer, I have seen some machines in terrible states. On the odd occasion I've had to open up the computer, they are usually filled with dust that clogs fans, heat sinks and exhaust ports. However, most of the time, the problem is software based, specifically the operating system.

Given the amount of malware that exists in the wild, it seems almost inevitable that the average consumer will eventually fall prey to some form of malicious software, whether delivered via a link in an email from a "friend", clicking a tempting ad on a torrent site, or even simply being unfortunate enough to navigate to a page containing an xss exploit. Some of the pop-ups masquerading as messages generated by the OS can be very convincing as well and scare users into clicking them by suggesting that their machine is "at risk".

While I despair at the number of ways a user can be trick into infecting their machine, I also find myself frustrated at the anti-virus companies themselves, for I have found they too can be responsible for helping a user compromise their machine. I'm talking about the stream of alerts and warnings that are generated by free security products, designed to coax a user away from the free product and onto a subscription-based version.

Obviously, it's in the AV companies interest to have more customers paying for their security tools and suites, so I understand the motive for embedding such messages into a free product. However, in my experience, once an AV suite's free trial expires the user will rarely fork out money to continue with the subscription. This is also an issue for free trials of AV suites that are bundled with machines. Essentially, the user continually ignores the warnings that their free trial has expired, which prevents them from downloading any additonal virus signatures or upgrades. The longer the user leaves it, the greater the risk of infection as their AV suite becomes more out of date.

I think what I find most disturbing about this trend is the wording used in these messages seem geared towards scaring users into upgrading. With phrases like "your PC is not fully protected" being presented to the user, alongside exclamation point warning signs, it's easy to become convinced that your machine is unsafe. This seems rather too close to the same tactics employed by FakeAV virus writers.

In my opinion, I think AV vendors should take two courses of action:
  1. If they are going to advertise their subscription-based product in the free application, then they should make it clearer that this is an advert and warn the user that agreeing to switch product will eventually require them to part with some money.
  2. If an upgrade does occur, it shouldn't have to be a manual process to re-install the free version of the product. Instead of preventing the software from receiving new virus definitions and attempting to warn the user if the danger, wouldn't it be easier to disable the components that make it a paid-for product?
I regularly recommend (and install) free security products, but I find it difficult explaining to people what alerts they should pay attention to and those they should ignore. As it stands currently, I tend towards ZoneAlarm (free edition) for the firewall and recently I switched my allegiance from AVG to Antivir, because of two events (coincidently, the same two events that spurred me onto getting this post published):

The first was a system tray alert from AVG informing me that it had protected me from over 400 threats this month, which I found rather alarming; both myself and my partner are careful users of the web and both of us tend to discuss any strange incidents that may occur during our day-to-day computer usage. I was fairly sure that with over 400 threats having been eliminated over the past month, there should have been some alerts from the AV software, and so I checked the application's event log to see when the system had been protected - nothing. There were no virus alerts that I could see, nor were there any viruses in the "Vault"; a quarantine area for suspicious files.

The final straw was during an upgrade to AVG Free 2012, I was prompted by the following dialog box to choose which version of the application to install:


First, if I had wanted to opt for the "full" version, I would have downloaded the relevant installer/paid for the product! However, I decided to investigate their claim that "you can always switch to basic protection later", in case it actually met my expectations as set out above. As I suspected; the only course of action was to completely un-install and re-install! I'm now keeping my fingers crossed that I don't have a similar experience with Antivir; otherwise I'll have to find another AV product to switch to!

Sunday, May 15, 2011

Cloning Windows Vista/7


Disk cloning tools can save hours of effort when upgrading a computer's hard drive, particularly when the drive in question contains an operating system. I recently purchased a new HDD (a Seagate ST31000528AS) for my home desktop to replace the aging (and full!) Seagate used for the Windows 7 installation.

There are plenty of tools available for imaging or cloning disks and partitions, including some excellent open source offerings. CloneZilla, for example, is one that I have used myself to image Windows XP installations for backup purposes. However, searching online revealed that cloning my Windows 7 installation to the new HDD wasn't going to be as easy; it would seem that since Windows Vista, Microsoft has changed the way Windows identifies hard disks and partitions. This prevents the operating system from locating the system partitions where it's installed if you migrate to a new HDD.

Reading various forum and blog posts revealed that cloning a Windows Vista or 7 install to a new drive would complete successfully, but result in a system I would be unable to boot from. Several posts detailed how it was possible to achieve a working system, but either involved editing the registry, using the Windows 7 install media's recovery mode, or a combination of the two.

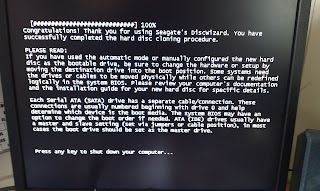
As I was in a hurry to upgrade the HDD, I didn't want to have to repeat the lengthy cloning process if I was unsuccessful, or end up with an unbootable OS that would need repairing. So I dug further until I found the Seagate Disk Wizard. At first glance, it appears very similar to other cloning/imaging tools; providing a method to create bootable media you can use in the migration process. One major difference though was that you could simply install the software onto the machine in question and start the migration process from your desktop.

I was wary of using the tool at first, as I couldn't see how it could be as efficient as bootable media that carried out the cloning process outside of any installed operating system or software. Searching around I found a forum post that not only confirmed the tool worked, but detailed it's operation too. Essentially, when run from the desktop, Disk Wizard allows you to plan your migration, before rebooting into a small utility that carries out the cloning process.

Suffice to say, before I began this process, I ensured that I had backed up the data on my system to another machine - The specific steps I took were:
  1. Connected the new drive to the 3rd SATA port on the motherboard in my PC.

  2. Booted into Windows and installed Seagate Disk Wizard.

  3. Ran Disk Wizard and started the clone utility.

  4. Carefully selected my source and destination drive.

  5. Opted to manually define the size I wanted the partitions to be on the new drive (even though I eventually just used the default values used by the partition tool!).

  6. Double-checked my settings before finally confirming I wanted to carry out the operation.

  7. My computer then restarted, booting into a very lightweight utility that managed the migration.

  8. After a long wait, the utility finished, prompting me to have my operating system installation media to hand in order to perform a repair of the installed OS.

  9. Powered off the machine.

  10. Disconnected the source disk from the 1st SATA port on the motherboard.

  11. Disconnected the destination drive from the 3rd port and connected it to the 1st.

  12. Powered the machine on. During Windows booting, there was a brief flash of some text relating to Seagate Disk Wizard. I suspect this is where the software updates the registry to use the IDs of the new drive and partition.

  13. Once the log in screen appeared, I was able to successfully log into my account and begin using my PC.

Since performing my upgrade in this way I have found some posts that detail successful migrations using open source tools (CloneZilla, GParted) while researching for this post. So, it appears that a seamless migration may be possible using these tools, but if you are after a quick solution for upgrading your system drive, then DiskWizard is a good option.

Tuesday, October 19, 2010

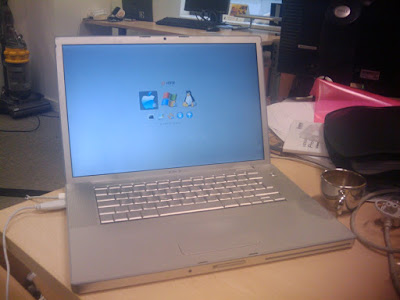
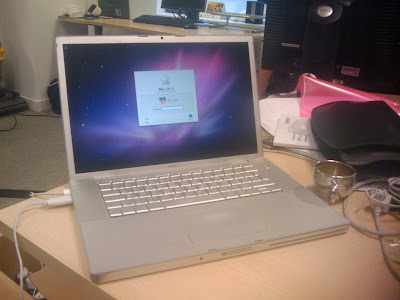
Triple-Boot MacBook Pro: OS X, Windows 7 and Fedora 13


I have finally been able to install (and, more importantly, boot) 3 distinct operating systems on my work laptop; a MacBook Pro 3,3. I have been using my Mac in a dual-boot configuration for several years now; booting between OS X and Fedora. Being able to boot into OS X has allowed me to apply any new firmware released as part of an Apple Software Update, as well as providing a quick-booting OS for basic web browsing (less so now with the advances made in the Fedora distribution and Linux in general).

Having used Windows 7 on my home PC for some time, I decided that this would be the version of Windows that I would endeavour to install on the Mac alongside the other two operating systems. I've found Windows 7 to be a great improvement over Vista and, dare I say it, actually an enjoyable desktop OS to use. Of course, Windows 7 would also allow me to fully partake in any gaming sessions that I happened upon while I had my laptop! However, the most compelling reason to get my Mac triple-booting was to learn more about GPT, EFI and the boot process in general on an EFI-based system.

Obviously, the first step I took was to ensure I had a recent backup of all the important data from my machine, as I would be completely trashing the existing partition table. Once I had done this, I began the installation of the first operating system.

OS X


I inserted the Snow Leopard installation DVD into the machine and booted from it. From the installer, I accessed the Disk Utility and created a new GPT partition scheme consisting of 4 partitions (well, technically 5, see below for further details):
  1. OS X: 90GB, HFS+, Journaled and Case-Sensitive

  2. WIN7: 120GB, MSDOS

  3. LINUX: 3GB, MSDOS

  4. LVM: Remaining Space, MSDOS

I then exited Disk Utility and continued with the installation of the operating system, directing the installer to use the "OS X" partition.

Windows 7


As the laptop uses an Intel Core 2 Duo CPU, I opted to install the 64bit version of Windows 7 Professional. When choosing where to install the operating system, the partitioning tool displayed a rather different view to the OS X Disk Utility; a small FAT partition (used by EFI) was positioned in front of the OS X partition, while some of the drive was marked as unallocated space. I carefully selected the 3rd partition, confirming I had the correct one by looking at it's label (WIN7) and size (approximately 120GB), and formatted it using the "Advanced" features of the partitioning tool. This is a necessary step, as the OS X Disk Utility formats the file system as FAT32 and Windows 7 requires NTFS. After this, I proceeded to select the partition I had just formatted and installed the OS.
During the installation process, the machine had to reboot, which meant I had to ensure that it booted from the Windows 7 partition in order to complete the install. On a Mac, this is accomplished by holding down the "alt" key on the keyboard when the system first boots. It causes a basic boot manager to eventually be displayed, where you can select which of the installed operating systems to boot.

Fedora 13


Finally, I booted off the Fedora 13 installation disc (again, opting for the 64bit release). When I was presented with the partitioning tool, I found I had to manually format the 4th partition as ext3 and the 5th partition as an LVM physical volume using the command line. This involved switching to another virtual console, which on a Mac requires you to hold down the "fn" and "alt" keys and press "F2". From here, it is possible to use the mkfs.ext3 and lvm command line tools to format /dev/sda4 partition, create an LVM physical volume on /dev/sda5, a volume group and some volumes.
Again, I had to be wary of choosing the wrong partitions because, as with the Windows 7 installation, the tools displayed a more complicated view of the partition table; the EFI partition and un-partitioned space were visible.
Once I had finished on the command line, I switched back to the graphical installer ("fn", "alt" and "F7") and instructed the partition manager to use /dev/sda4 as the root partition and the newly created LVM volumes for /usr, /tmp, /var, /home and swap. It's important to note that I didn't define a separate /boot partition; this is because I wanted to keep the partition scheme as simple as possible, see below for details.
When the installer reached the stage where you define where GRUB should be installed, I found that the suggested default option was what I needed; /dev/sda4. This is different to a more vanilla install of Fedora, where you would usually install GRUB to the Master Boot Record (MBR); here, there is no MBR to install to as the partition scheme is GPT.

Final Steps

After the Fedora installation completed, I rebooted into OS X (by simply not pressing anything when the machine initially boots) and installed rEFIt. This appears to be the only bootloader that would allow me to boot all three installed operating systems. I had to run the rEFIt partitioning tool before this was possible however; accessible when rEFIt loads at boot-time. This performs the necessary magic that syncs the hybrid GPT/MBR partition table, allowing each OS to boot correctly. I had to perform one final restart of the machine, which is another option in the rEFIt bootloader, and then my triple-boot Mac was complete; apart from all the subsequent OS updates and configuration, of course!

Troubles Encountered and Lessons Learnt

As mentioned previously, this install procedure took me several attempts to get right. I tried using boot camp originally, but soon found that it added unnecessary complexity to the partitioning process. I also found some guides that demonstrated methods for partitioning the disc using the Disk Utility in OS X, but this assumed an existing OS X installation was present on the system. However, as this second approach mentioned the use of Disk Utility, I assumed that using this tool to create the partition scheme for all the operating systems would work; and I was correct!

While on the subject of partitioning, I did end up discovering exactly how the hybrid GPT/MBR partition table works. OS X itself requires a GPT partition scheme; it simply refuses to install to any MBR-style disk. However, Windows requires an MBR partition scheme to boot from and will refuse to install into a partition that it believes resides on a GPT formatted disk.

The hybrid GPT/MBR scheme allows the first 4 partitions of the GPT scheme to be used as an MBR-style disk. However, it is not possible for one of these partitions to be created as an extended partition. On a pure MBR disk, you are restricted to defining 4 primary partitions. One of these can be used to hold further logical partitions, which allows for more complicated partition schemes (i.e. more than 4 partitions).

Because GPT does not allow for extended and logical partitions to be defined, a hybrid implementation limits the MBR scheme to 4 primary partitions. On top of that, because we're booting an EFI based system, there is a hidden FAT32 partition at the beginning of the disk where boot configuration is stored. This brings the total number of MBR partitions available for operating systems to 3; hence why my 2nd, 3rd and 4th partitions are used by OS X, Windows 7 and Fedora's root/boot file systems respectively. Theoretically, it should be possible to install a Linux distribution into higher numbered partitions, however the GRUB boot loader used by Fedora only understands MBR, not GPT. In order to maintain some file system organisation, I created the 5th partition as an LVM logical volume, bringing all the flexibility of resizeable volumes to the Fedora install.

The other major issue encountered was actually booting off the Windows 7 install DVD. I had sourced a copy of Windows 7 Professional 64bit from the Microsoft Partner program site; which resulted in a rather large ISO image being downloaded to my machine. After burning this to DVD and attempting to boot off the disc, I found I was unable to progress past what appeared to be a broken boot menu. There were 2 options, however, both were lacking any explanation as to what it was I would be booting into! On top of that, neither option appeared to want to boot, and I was left with the impression that the system had actually crashed.

I did some research and found that the problem because of the way the image was mastered. Apparently, some important component used in the boot process is not able to handle files that conform to the ISO 9660 standard; specifically, version numbers being appended to the file name.

This made it necessary to re-master the provided image and burn it with some rather specific settings; the most important seemed to be force the omission of the version numbers (see the previously linked blog post for further details). Once I did this, the laptop booted from the disc perfectly.

Overall, I'm very pleased with the fruits of my labour. The real test will be to see if I can replicate the results on another machine.

Saturday, February 20, 2010

Acer System Restore Functionality

Many PC vendors today appear to eschew providing installation or restore discs, instead opting for hidden partitions on the system's hard drive to contain the factory default image and restore utility. This has the advantage that you can restore your system without needing to locate any installation media, however, it can cause a bit of a problem if the restore partition is corrupt, missing or you're unable to boot into it!


I was recently rebuilding two Acer laptops; an Aspire 1360 and an Aspire 3690. While backing up user data from both machines, I noticed the existence of restore partitions. After some research, I discovered that the way to access the restore system was to press alt+F10 when booting the system.


The restore functionality for the Aspire 1360 worked without any issue; the machine booted into a pre-configured Norton Ghost instance. I was asked for my confirmation before overwriting the operating system partition with the stock Windows XP image.


However, when I attempted to access the restore partition on the Aspire 3690, I could only access a boot loader screen that offered me the choice of booting either the installed Vista Home Basic instance, or a memory checking utility. After trawling some forums, it appeared that other people have experienced similar issues; usually after re-installing the OS from a standard Windows install CD/DVD. This is because only the Acer supplied image contains the appropriate boot loader option to access the restore feature.


Fortunately, I had a copy of the Ultimate Boot CD (UBCD), which I used to manually select the partition to boot from. The UBCD is a very useful tool to have lying around; it contains a myriad of different utilities that can prove useful in the event of an emergency. Booting from the CD presents you with a ASCII-based menu system where you can access the various tools.


I used the Smart BootManager, which I accessed by navigating to File System Tools -> Boot Managers and selecting the relevant entry:


Once the Smart Boot Manager had loaded, it was possible to select the first partition on the hard disk (Primary 1) and boot into the recovery software.


Please note, the above image is not representative of the Acer Aspire 3690 partition scheme, just so it doesn't confuse anybody attempting to retrace my steps! It's simply a screen shot I took when running the utility on a test VM I have.

Sunday, October 25, 2009

Office 2007 File Open/Save Dialog Issue

I have encountered a strange/annoying issue with Microsoft Office 2007 on a laptop with Windows XP SP3 as the operating system. This might affect other versions of Windows, however, I've been unable to confirm this as of yet.

Essentially, the problem was this: when using the file open or save dialog in the Office suite, clicking the drop-down menu at the top of the box in order to choose a location to save/open a file would result in a indeterminate progress bar appearing, with a title that stated "Initializing the Root Folders to Display".

This would remain for what seems like an eternity, before eventually disappearing and allowing the drop-down menu to finally render.

After doing some Googling around, it would seem this is a well known problem, caused by unreachable network drives. Here's a couple of pages, dating back to 2007(!), that discuss the issue:

http://benperove.com/howto/fix-initializing-the-root-folders-to-display-message/

http://forums.techarena.in/ms-office-support/652449.htm

And this is from Microsoft themselves:

http://support.microsoft.com/kb/313937


So, it would seem the issue is to simply not use persistent network shares, i.e. disconnect any network drives you might use. Although Microsoft provide some alternative solutions, I feel that they're missing the point: this is a Microsoft application failing to work "properly" with their own underlying operating system!

I have yet to decide on a solution for my own environment; as the network share resides on a small server that's not constantly powered on, a user logon script means the user will be bothered by a rather obtrusive DOS window while the relevant "net use" command times out attempting to connect. I suspect a simple shortcut will have to be the answer.