Following on from my last post, I decided to do something about the (albeit minor) performance issues with my VR setup. I had seriously considered a BIOS mod for my 970, going so far as to download the necessary tools to dump out the BIOS image and fiddle with the voltage settings. However, in the end, I went with what could be considered an even crazier option: I bought a load of new hardware! Specifically, I bought the following (affiliate links ahoy):
MSI Geforce GTX 1070 Seahawk EK

The 1070 was the lesser card to the 1080 in Nvidia's Pascal launch lineup, I managed to pick up the MSI Geforce GTX 1070 Seahawk EK edition for a very reasonable price from Overclockers.co.uk after Nvidia announced the 1080Ti. It comes with a factory installed waterblock manufactured by EK Water Blocks, which meant I also needed to purchase...
XSPC Raystorm Pro Ion AX360 Watercooling Kit

A water-cooling kit. As this would be my first custom cooling loop, I tried to make things as simple as I could for myself and bought this starter kit, which includes:
- XSPC Ion Pump/Reservoir
- XSPC RayStorm Pro WaterBlock (Intel)
- XSPC AX360 Triple Fan Watercooling Radiator (Black)
- 2m of XSPC HighFlex Clear Hose (7/16" or 11mm inner diameter, 5/8" or 16mm outer diameter)
- 6x XSPC G1/4" Black Chrome Compression Fittings
- 3x 12cm fans (unsure of the make/model).
2x XSPC Black Chrome Compression Fittings

I ordered two more compression fittings in addition to the six supplied in the kit, as I'd be incorporating the 1070 into the loop.
2x XSPC G1/4" Plug Fitting Black Chrome

I bought two of these, but this turned out to be unnecessary, as the 1070 ships with it's own plugs. However, I opted to install these two anyway as they're black chrome, which matched my other fittings, whereas the pair shipped with the Seahawk are just chrome. A small detail, but it matters!
XSPC HighFlex Hose 7/16" ID 5/8" OD 15.9/11.1mm 2m Clear

Some additional tubing in case I needed it and/or made any mistakes when cutting.

Maybe unnecessary, but I wanted to make sure I had nice, clean cuts in my tubing to help mitigate against leaks.
2x Mayhems Pastel White Premixed Watercooling Fluid 1L

I had originally thought about using white tubing in place of white coolant, as I'd read reports of coloured liquids clogging up loop components over time. However, once I started looking into what additional components I might need to prevent the build up of organic materials in the loop (e.g. kill coils, biocides, etc.), I just decided to go with a pre-mixed coolant. As the kit I was using provided clear tubing, I went with pastel white to give me the desired look. I ended up ordering two bottles of this, and I think I may have used around half of one when filling my loop!
Distilled Water - 20 Litre (20L) - Pure Steam Distilled - 0ppm

Definitely overkill here, but I bought this distilled water to aid in flushing through the radiator after I'd used hot water to remove any metallic remnants inside before I began the install.
FWIW, I ordered the graphics card, cooling kit, 1/4" plugs and additional host from Overclockers.co.uk, but they didn't respond to my request to sign up to their affiliate program (I probably don't get nearly enough visitors to qualify), hence all the Amazon links!
So, onto the build, which I handily took pictures throughout to document the process.
The Parts

MSI Geforce GTX 1070 Seahawk EK and XSPC Raystorm Pro Ion AX360 Watercooling Kit

The MSI Geforce GTX 1070 Seahawk EK - check out that water block!
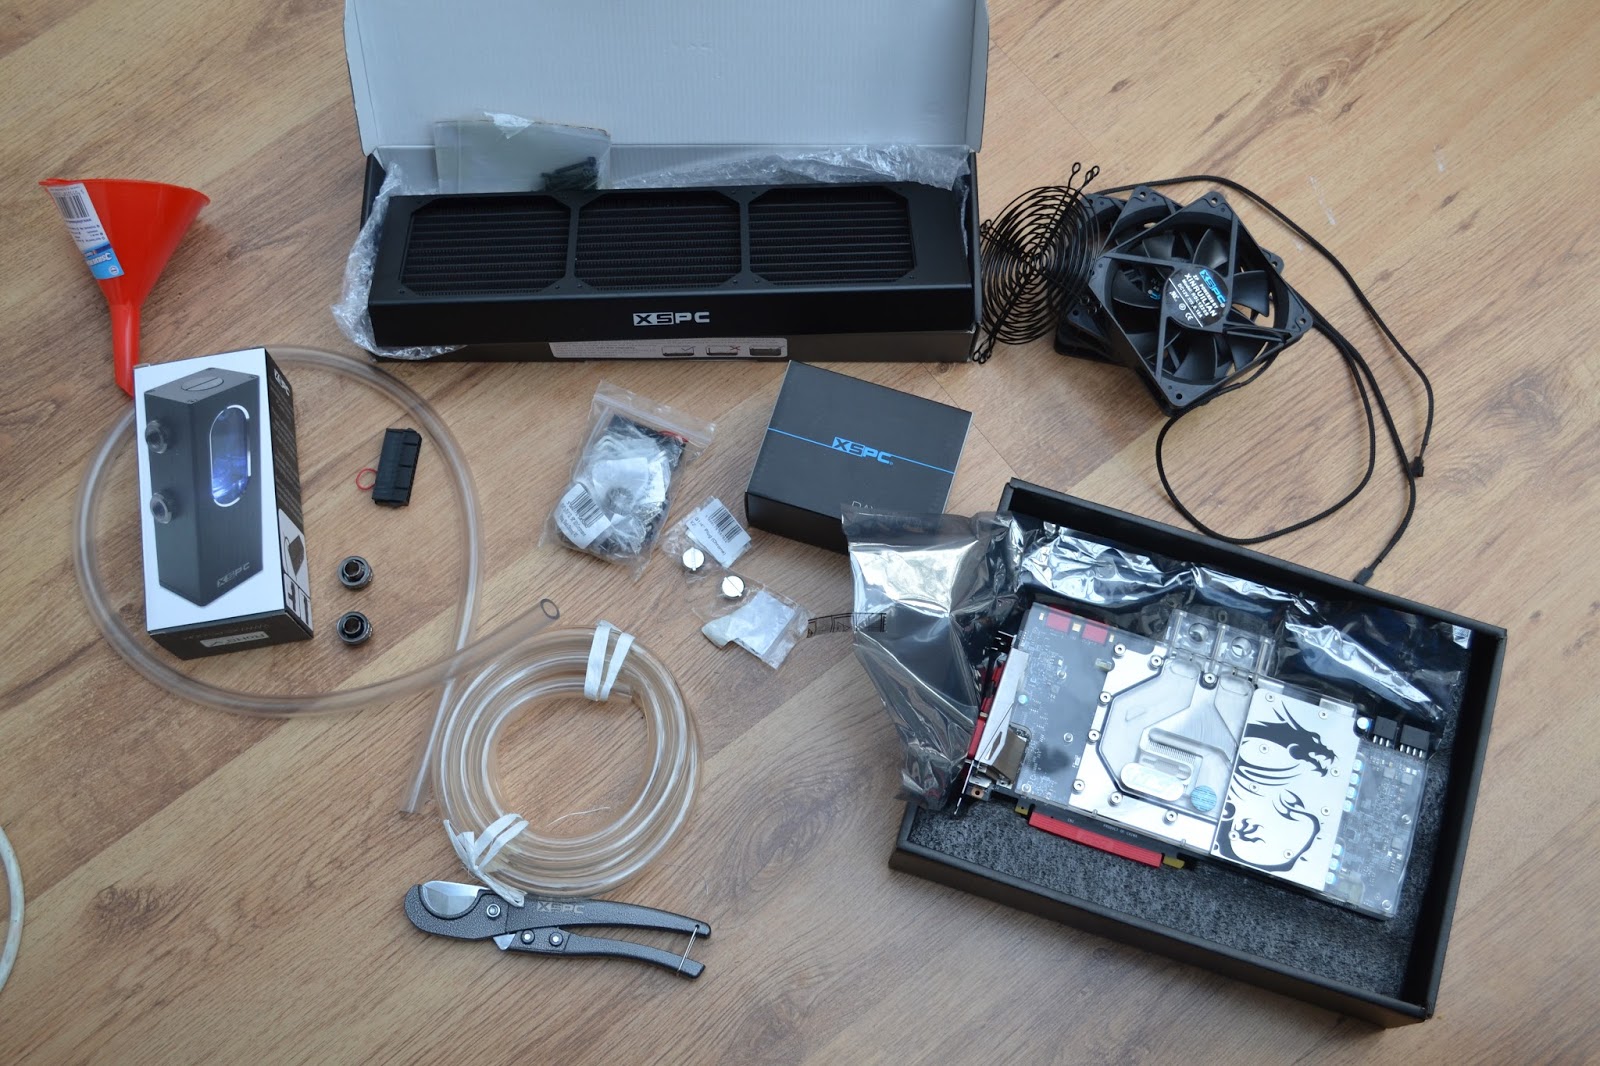
All the parts laid out

Distilled water and coolant
The Process

The Corsair H80i and MSI Geforce GTX 970 Gaming 4GB to be removed

H80i and 970 removed

The XSPC RayStorm Pro WaterBlock parts - socket 1150/1151/1155/1156 backplate, socket 1366 backplate, fittings, twin LED, thermal paste and water block itself

CPU block installed

The entire loop fitted - it took a long time to reach this point!

Filling the loop - after this, I did a 24 hour leak test!
Final Result

First time I powered the system on - side panel still removed

Side panel back on

Close up of CPU block

Close up of graphics card

Close up of entire system

Shot across the keyboard

Another close up inside

Shot across the desk in the dark

Entire battlestation
After an entire weekend of work, I am totally enamoured with the final aesthetic I've achieved. It's been a few years since I started "Project Icarus", with various different upgrades along the way, but this upgrade really makes for a "wow" system IMHO. The upshot of this is I'm unlikely to do any major upgrades for a year, because it'll likely result in me having to drain, clean and refill the loop! Instead I'll be focusing on peripherals for my Vive (TPCast or other wireless solution and the deluxe audio strap are high on my list of priorities), but I'm also keen to completely remove spinning magnetic media from the system and go completely solid state.