In what's becoming a yearly occurrence, over the Christmas and New Year break I planned a major upgrade of primary gaming rig, Daedalus. Since I built the machine back in 2010, it's had plenty of new hardware: an HDD upgrade, GPU upgrade, new monitor, new CPU cooler, an SSD, new keyboard and an Eyefinity setup. I've also tweaked the system above and beyond manufacturers' specifications: unlocking and overclocking the processor and adding custom VRM cooling.
However, this time I felt a big change was in order. After I had finished picking out my new components, it was clear this was going to be no ordinary upgrade, but a (re)build that would be a mixture of new and old parts. It was time for Daedalus to make way for his successor; Icarus.

Part List
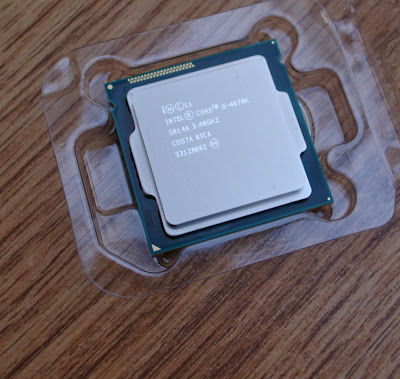
Processor
Intel Core i5-4670K
- this was the starting point for the whole upgrade. After seeing the performance of my parent's PC, I was keen to upgrade to an Intel Haswell CPU, so a quad core i5 was the obvious choice after using a tri-core Phenom II for the last few years. An i7 would have been nice, but the Hyper-threading makes a negligible difference in games so I didn't feel the extra expense worth it. As I have an interest in overclocking, I needed an"K" part so I could adjust the CPU's multiplier; this final requirement whittled down my choice to the 4670K.

Motherboard
Asus Maximus VI Hero
- after buying an old Republic of Gamers board for my secondary system, Phoenix, I was convinced about using one for my primary system, but they aren't cheap to buy new! I ended up opting for the Hero as it was one of the cheapest, the other being a Micro ATX board (the Maximus VI Gene
). The Z87 chipset on the board is a necessity for overclocking, but ROG motherboards also have a plethora of options in then BIOS to facilitate the process, so in my opinion it's a perfect match for the 4670K.

Memory
Kingston KHX16C9P1K2/16
- originally, I had intended to simply use the 4GB of RAM present in Daedalus, but I eventually splashed out on 16GB of Kingston memory. I would have needed to buy additional memory for the older machine in order to keep it in service anyway, plus I knew the memory was compatible and stable with the adjustments I had made to the Phenom II.

Case
Corsair Obsidian 750D
- I hadn't originally considered a case as part of the upgrade. However, I had been finding my Thermaltake M9 a bit cramped of late, especially given it's lack of cable management. The final nail in the coffin was the M9's lack of USB 3.0 front panel connectivity; most, if not all, modern motherboards have a USB 3.0 header and my ROG board was no exception. I have been reading good reviews of Corsair cases for a while now, and after having gained some first hand experience with a 200R, I wanted one for my new build. If my budged had stretched to it, I would have gone for a 900D
, but that and the 800D
were far too expensive. I settled for a 750D, which I am more than satisfied with.

Thermal Paste
Arctic Silver 5
- my thermal interface material of choice.

Operating System
Windows 8.1 Standard Edition 64bit OEM
- even with all the negative press and opinions about the operating system, I was interested in using Windows 8 for my gaming rig. I had read about improvements in frame rates, as well as other areas of the system (USB subsystem and task manager, for example). One other advantage of buying a new OS is that I still have my Windows 7 license to use with Daedalus.

Expansion
NZXT IU01 Internal USB Expansion
- this wasn't part of my original purchases. Instead, I ended up having to buy this as the onboard USB headers didn't provide enough juice to power my Razer Megalodon headphones through the front panel ports.

The Build
To try and keep this post succinct, I've made some bullet points regarding the build and noteworthy observations I have made after using the system for a short while.
- Building in the 750D was a dream. This is by far the largest case I've ever owned and I love all the room I have available to me, as well as the integrated cable management.

- The 750D seemed to ship with a different number of accessories than suggested by the manual; there were fewer screws and motherboard standoffs. This might have caused problems if I'd had something other than an ATX motherboard.

- While installing my hard disk, I ended up breaking a quick release tab on one of the 3.5" drive caddies. Not a big problem, as there are six of them in total and I pulled out one of the cages anyway. However, it did cause me a bit of discomfort knowing I'd broken something on my nice new case, even if I wasn't going to use it. Being as OCD as I am, I may try and find a replacement on EBay or simply contact Corsair.

- As usual, I was very impressed with the motherboard; Asus never fail to deliver. This is my second Republic of Gamers purchase and I suspect it won't be my last. I love the styling and the little details, like the ROG branded I/O shield. The only problem I've had with it is that the chipset used for temperature monitoring isn't supported by SpeedFan.


- Powering the system on for the first time I was pleasantly surprised to see that the Asus ROG logo that you see during the POST process actually replaces the normal Windows logo once the OS starts to boot. It's worth noting that this only occurs if you boot using EFI, as opposed to the legacy BIOS boot method.
- When Haswell was first announced and it's architecture was revealed, I remember reading how the on die VRM increased the amount of heat generated by the package. However, during my initial stress tests I was not prepared to see my H80i struggling to keep the CPU temperature (both as reported by the motherboard and the 4670k cores themselves) below the maximum operating temperature specified by Intel (approximately 72°C)! I'm aware that the CPU will throttle itself to prevent damage once temperatures reach critical levels, but I will be suspending further stress testing (and definitely no overclocking!) until I have a better cooling solution. Given the size of the case, I think I'll graduate to a custom cooling loop, which will be a first for me.

- To try and improve the CPU thermals, I decided to disconnect the two 120mm radiator fans from the H80i and reconnect them to the motherboard's CPU_FAN and CPU_OPT headers. This allows the Asus AI Suite III to manage the fan speed as the CPU temperature changes.
- The ROG colour scheme of red and black clashes with my existing blue and black motif. The motherboard not only has red splashes of colour throughout, but it also has a red LED stripe running through a section; I had to adjust the LED in the H80i cooling block to match. I probably could have added some of my 120mm blue LED fans, but I was keen to use 140mm fans where possible as the case supports them.


That's the hardware and build out of the way, I have yet to finish my benchmarking, but once I have I'll be sure to write a post around the results. I've also been making some observations about Windows 8, which is worth it's own separate post as well and I'll try to get that written up quickly as well. It's been difficult to focus on writing with all the new games I've acquired over the last month or so!