Showing posts with label upgrade. Show all posts

Saturday, July 8, 2017

Driving Me Loopy: Custom Water Loop Upgrade

Following on from my last post, I decided to do something about the (albeit minor) performance issues with my VR setup. I had seriously considered a BIOS mod for my 970, going so far as to download the necessary tools to dump out the BIOS image and fiddle with the voltage settings. However, in the end, I went with what could be considered an even crazier option: I bought a load of new hardware! Specifically, I bought the following (affiliate links ahoy):

MSI Geforce GTX 1070 Seahawk EK

The 1070 was the lesser card to the 1080 in Nvidia's Pascal launch lineup, I managed to pick up the MSI Geforce GTX 1070 Seahawk EK edition for a very reasonable price from Overclockers.co.uk after Nvidia announced the 1080Ti. It comes with a factory installed waterblock manufactured by EK Water Blocks, which meant I also needed to purchase...

XSPC Raystorm Pro Ion AX360 Watercooling Kit

A water-cooling kit. As this would be my first custom cooling loop, I tried to make things as simple as I could for myself and bought this starter kit, which includes:

2x XSPC Black Chrome Compression Fittings

I ordered two more compression fittings in addition to the six supplied in the kit, as I'd be incorporating the 1070 into the loop.

2x XSPC G1/4" Plug Fitting Black Chrome

I bought two of these, but this turned out to be unnecessary, as the 1070 ships with it's own plugs. However, I opted to install these two anyway as they're black chrome, which matched my other fittings, whereas the pair shipped with the Seahawk are just chrome. A small detail, but it matters!

XSPC HighFlex Hose 7/16" ID 5/8" OD 15.9/11.1mm 2m Clear

Some additional tubing in case I needed it and/or made any mistakes when cutting.

XSPC Heavy Duty Hose Cutter

Maybe unnecessary, but I wanted to make sure I had nice, clean cuts in my tubing to help mitigate against leaks.

2x Mayhems Pastel White Premixed Watercooling Fluid 1L

I had originally thought about using white tubing in place of white coolant, as I'd read reports of coloured liquids clogging up loop components over time. However, once I started looking into what additional components I might need to prevent the build up of organic materials in the loop (e.g. kill coils, biocides, etc.), I just decided to go with a pre-mixed coolant. As the kit I was using provided clear tubing, I went with pastel white to give me the desired look. I ended up ordering two bottles of this, and I think I may have used around half of one when filling my loop!

Distilled Water - 20 Litre (20L) - Pure Steam Distilled - 0ppm

Definitely overkill here, but I bought this distilled water to aid in flushing through the radiator after I'd used hot water to remove any metallic remnants inside before I began the install.

FWIW, I ordered the graphics card, cooling kit, 1/4" plugs and additional host from Overclockers.co.uk, but they didn't respond to my request to sign up to their affiliate program (I probably don't get nearly enough visitors to qualify), hence all the Amazon links!

So, onto the build, which I handily took pictures throughout to document the process.

The Parts

MSI Geforce GTX 1070 Seahawk EK and XSPC Raystorm Pro Ion AX360 Watercooling Kit

The MSI Geforce GTX 1070 Seahawk EK - check out that water block!

All the parts laid out

Distilled water and coolant

The Process

The Corsair H80i and MSI Geforce GTX 970 Gaming 4GB to be removed

H80i and 970 removed

The XSPC RayStorm Pro WaterBlock parts - socket 1150/1151/1155/1156 backplate, socket 1366 backplate, fittings, twin LED, thermal paste and water block itself

CPU block installed

The entire loop fitted - it took a long time to reach this point!

Filling the loop - after this, I did a 24 hour leak test!

Final Result

First time I powered the system on - side panel still removed

Side panel back on

Close up of CPU block

Close up of graphics card

Close up of entire system

Shot across the keyboard

Another close up inside

Shot across the desk in the dark

Entire battlestation

After an entire weekend of work, I am totally enamoured with the final aesthetic I've achieved. It's been a few years since I started "Project Icarus", with various different upgrades along the way, but this upgrade really makes for a "wow" system IMHO. The upshot of this is I'm unlikely to do any major upgrades for a year, because it'll likely result in me having to drain, clean and refill the loop! Instead I'll be focusing on peripherals for my Vive (TPCast or other wireless solution and the deluxe audio strap are high on my list of priorities), but I'm also keen to completely remove spinning magnetic media from the system and go completely solid state.

Wednesday, September 24, 2014

Cleanin' Out My Closet: MacBook Pro SSD Upgrade and Clean Up

Despite my dislike for all things Apple, I do actually own a MacBook Pro 6,2 (Mid 2010) that I've been using as a work machine for the last 4 years. This system has helped me understand a great deal about multibooting operating systems, GPT vs. MBR and (U)EFI booting, so it's not all bad! For a while now, the system has been showing it's age, with the mechanical hard disk the primary bottleneck. It's also been in desperate need of both a physical clean out of all the dust that's gradually built up over time and a re-installation of the three operating systems I have on the machine. I finally made the decision to actually try and carry out this much needed maintenance after the recent release of Corsair's MX100 SSD:

It's not the fastest SATA SSD you can buy currently, but it certainly has the lowest price per GB (at the time of writing): I ended up buying the 512GB model from Amazon, costing just under £150, to replace the HDD in my Mac. To facilitate the transfer of my data back onto my laptop, I picked up a cheap USB 3.0 HDD caddy as well. As I was going to have to open the system up, I decided to not only clean out the dust from the system, but to completely strip the laptop down and replace the thermal paste under the heat sink. I already have a couple of tubes of Arctic Silver 5 thermal paste, so I simply added some ArctiClean and some compressed air to my order. Later, after commencing the disassembly of the system, I was unable to find my Torx screwdrivers necessary to complete the process, so I ended up buying a replacement set:

I have replaced many storage devices in Apple laptops over the past few years, so I was comfortable with the SSD upgrade, however, the cleanout and thermal paste replacement seemed like it would be a far more complex task. Thankfully, iFixIt have some excellent guides on the maintenance of Apple products and I found a specific guide for removing the heat sink assembly; it's worth noting that iFixIt have flagged this process as "difficult", confirming my initial fears! Still, I was determined to take on the challenge, as I'll demonstrate with pictures I took throughout the process:
Removing the bottom of the laptop's chassis; this step is necessary for pretty much all the hardware maintenance you'll need to perform on this particular model.

Eww.

Double eww.

WTF!?! After removing the heat sink, I was greeted with this sight: this seems to be far too much thermal paste.

The CPU and GPU ready for fresh thermal paste. I stopped short of scraping the remnants from around the chip edges as I was afraid I'd break something - I'm used to chips with integrated heat spreaders!

After putting the system back together,  I made a small prayer and offering to the Machine Spirit within and powered it on: success! It booted without issue and I was pleased to find that during the arduous process of installing/updating the three operating system, it not only performed a lot better (thanks to the SSD), but it was a lot quieter. However, since I've been working with the machine for a few days, I've noticed that the fans still spin up fairly regularly while I'm working in Linux; but there seems to be rather high CPU utilisation, even after switching to the proprietary Nvidia driver. Something for me to investigate further; at least I know it's able to actually dissipate the heat after I've cleaned out the heat sink!

Monday, June 16, 2014

Affordable SSDs for All!

SSDs are one of the best ways to give a new lease of life to an older machine: dropping your seek/access times below the 1ms threshold really does result in a snappy desktop experience. Since upgrading my primary system with an SSD, the difference is astounding; especially after transferring some select gaming titles over to it. So, I just had to share this amazing discovery I made over the weekend after looking at a possible upgrade for my brother's PC; the 500GB Samsung 840 EVO 500GB Samsung 840 EVO is under £200! Now, this isn't the fastest SSD on the market, or even from Samsung's own product portfolio (that crown goes to the 840 Pro range of SSDs), but it is a fantastically low price for the amount of solid-state storage you'd be getting. On top of that, you get a 3 year (limited) warranty; longer than that offered by most HDD manufacturers. If the 500GB model still seems a bit expensive, the 256GB model is less than £100, which is the perfect size for a boot/system drive. If your interested is piqued, please use one of the affiliate links in this post, as you'll be supporting me and my own hardware habit!

Tuesday, January 28, 2014

New Build: Spreading My Wings - Part 1

In what's becoming a yearly occurrence, over the Christmas and New Year break I planned a major upgrade of primary gaming rig, Daedalus. Since I built the machine back in 2010, it's had plenty of new hardware: an HDD upgrade, GPU upgrade, new monitor, new CPU cooler, an SSD, new keyboard and an Eyefinity setup. I've also tweaked the system above and beyond manufacturers' specifications: unlocking and overclocking the processor and adding custom VRM cooling.

However, this time I felt a big change was in order. After I had finished picking out my new components, it was clear this was going to be no ordinary upgrade, but a (re)build that would be a mixture of new and old parts. It was time for Daedalus to make way for his successor; Icarus.


Part List

Processor

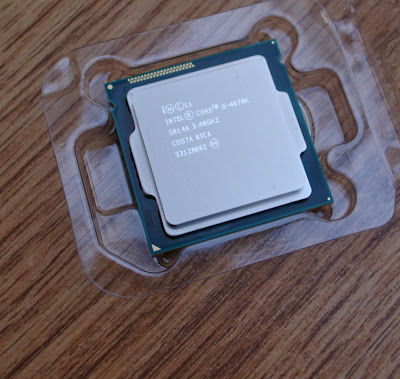
Intel Core i5-4670K - this was the starting point for the whole upgrade. After seeing the performance of my parent's PC, I was keen to upgrade to an Intel Haswell CPU, so a quad core i5 was the obvious choice after using a tri-core Phenom II for the last few years. An i7 would have been nice, but the Hyper-threading makes a negligible difference in games so I didn't feel the extra expense worth it. As I have an interest in overclocking, I needed an"K" part so I could adjust the CPU's multiplier; this final requirement whittled down my choice to the 4670K.

Motherboard

Asus Maximus VI Hero - after buying an old Republic of Gamers board for my secondary system, Phoenix, I was convinced about using one for my primary system, but they aren't cheap to buy new! I ended up opting for the Hero as it was one of the cheapest, the other being a Micro ATX board (the Maximus VI Gene). The Z87 chipset on the board is a necessity for overclocking, but ROG motherboards also have a plethora of options in then BIOS to facilitate the process, so in my opinion it's a perfect match for the 4670K.

Memory

Kingston KHX16C9P1K2/16 - originally, I had intended to simply use the 4GB of RAM present in Daedalus, but I eventually splashed out on 16GB of Kingston memory. I would have needed to buy additional memory for the older machine in order to keep it in service anyway, plus I knew the memory was compatible and stable with the adjustments I had made to the Phenom II.

Case

Corsair Obsidian 750D - I hadn't originally considered a case as part of the upgrade. However, I had been finding my Thermaltake M9 a bit cramped of late, especially given it's lack of cable management. The final nail in the coffin was the M9's lack of USB 3.0 front panel connectivity; most, if not all, modern motherboards have a USB 3.0 header and my ROG board was no exception. I have been reading good reviews of Corsair cases for a while now, and after having gained some first hand experience with a 200R, I wanted one for my new build. If my budged had stretched to it, I would have gone for a 900D, but that and the 800D were far too expensive. I settled for a 750D, which I am more than satisfied with.

Thermal Paste

Arctic Silver 5 - my thermal interface material of choice.

Operating System

Windows 8.1 Standard Edition 64bit OEM - even with all the negative press and opinions about the operating system, I was interested in using Windows 8 for my gaming rig. I had read about improvements in frame rates, as well as other areas of the system (USB subsystem and task manager, for example). One other advantage of buying a new OS is that I still have my Windows 7 license to use with Daedalus.

Expansion

NZXT IU01 Internal USB Expansion - this wasn't part of my original purchases. Instead, I ended up having to buy this as the onboard USB headers didn't provide enough juice to power my Razer Megalodon headphones through the front panel ports.


The Build

To try and keep this post succinct, I've made some bullet points regarding the build and noteworthy observations I have made after using the system for a short while.

  • Building in the 750D was a dream. This is by far the largest case I've ever owned and I love all the room I have available to me, as well as the integrated cable management.


  • The 750D seemed to ship with a different number of accessories than suggested by the manual; there were fewer screws and motherboard standoffs. This might have caused problems if I'd had something other than an ATX motherboard.


  • While installing my hard disk, I ended up breaking a quick release tab on one of the 3.5" drive caddies. Not a big problem, as there are six of them in total and I pulled out one of the cages anyway. However, it did cause me a bit of discomfort knowing I'd broken something on my nice new case, even if I wasn't going to use it. Being as OCD as I am, I may try and find a replacement on EBay or simply contact Corsair.

  • As usual, I was very impressed with the motherboard; Asus never fail to deliver. This is my second Republic of Gamers purchase and I suspect it won't be my last. I love the styling and the little details, like the ROG branded I/O shield. The only problem I've had with it is that the chipset used for temperature monitoring isn't supported by SpeedFan.


  • Powering the system on for the first time I was pleasantly surprised to see that the Asus ROG logo that you see during the POST process actually replaces the normal Windows logo once the OS starts to boot. It's worth noting that this only occurs if you boot using EFI, as opposed to the legacy BIOS boot method.
  • When Haswell was first announced and it's architecture was revealed, I remember reading how the on die VRM increased the amount of heat generated by the package. However, during my initial stress tests I was not prepared to see my H80i struggling to keep the CPU temperature (both as reported by the motherboard and the 4670k cores themselves) below the maximum operating temperature specified by Intel (approximately 72°C)! I'm aware that the CPU will throttle itself to prevent damage once temperatures reach critical levels, but I will be suspending further stress testing (and definitely no overclocking!) until I have a better cooling solution. Given the size of the case, I think I'll graduate to a custom cooling loop, which will be a first for me.


  • To try and improve the CPU thermals, I decided to disconnect the two 120mm radiator fans from the H80i and reconnect them to the motherboard's CPU_FAN and CPU_OPT headers. This allows the Asus AI Suite III to manage the fan speed as the CPU temperature changes.
  • The ROG colour scheme of red and black clashes with my existing blue and black motif. The motherboard not only has red splashes of colour throughout, but it also has a red LED stripe running through a section; I had to adjust the LED in the H80i cooling block to match. I probably could have added some of my 120mm blue LED fans, but I was keen to use 140mm fans where possible as the case supports them.


That's the hardware and build out of the way, I have yet to finish my benchmarking, but once I have I'll be sure to write a post around the results. I've also been making some observations about Windows 8, which is worth it's own separate post as well and I'll try to get that written up quickly as well. It's been difficult to focus on writing with all the new games I've acquired over the last month or so!