Showing posts with label sysadmin. Show all posts

Friday, March 1, 2013

Knife Bootstrap Failure - no such file to load -- rubygems/format (LoadError)

I just experienced an issue when trying to bootstrap a new Chef node in EC2 using the "knife ec2 server create" command. Everything seemed to be proceeding normally, until the actual node attempted to run Chef to register with the server; instead I was greeted with the following error:

/usr/lib/ruby/site_ruby/1.8/rubygems/core_ext/kernel_require.rb:45:in `gem_original_require': no such file to load -- rubygems/format (LoadError)
ec2-54-228-10-198.eu-west-1.compute.amazonaws.com from /usr/lib/ruby/site_ruby/1.8/rubygems/core_ext/kernel_require.rb:45:in `require'
ec2-54-228-10-198.eu-west-1.compute.amazonaws.com from /usr/lib64/ruby/gems/1.8/gems/chef-10.24.0/bin/../lib/chef/provider/package/rubygems.rb:34
ec2-54-228-10-198.eu-west-1.compute.amazonaws.com from /usr/lib/ruby/site_ruby/1.8/rubygems/core_ext/kernel_require.rb:45:in `gem_original_require'
ec2-54-228-10-198.eu-west-1.compute.amazonaws.com from /usr/lib/ruby/site_ruby/1.8/rubygems/core_ext/kernel_require.rb:45:in `require'
ec2-54-228-10-198.eu-west-1.compute.amazonaws.com from /usr/lib64/ruby/gems/1.8/gems/chef-10.24.0/bin/../lib/chef/providers.rb:60
ec2-54-228-10-198.eu-west-1.compute.amazonaws.com from /usr/lib/ruby/site_ruby/1.8/rubygems/core_ext/kernel_require.rb:45:in `gem_original_require'
ec2-54-228-10-198.eu-west-1.compute.amazonaws.com from /usr/lib/ruby/site_ruby/1.8/rubygems/core_ext/kernel_require.rb:45:in `require'
ec2-54-228-10-198.eu-west-1.compute.amazonaws.com from /usr/lib64/ruby/gems/1.8/gems/chef-10.24.0/bin/../lib/chef.rb:25
ec2-54-228-10-198.eu-west-1.compute.amazonaws.com from /usr/lib/ruby/site_ruby/1.8/rubygems/core_ext/kernel_require.rb:45:in `gem_original_require'
ec2-54-228-10-198.eu-west-1.compute.amazonaws.com from /usr/lib/ruby/site_ruby/1.8/rubygems/core_ext/kernel_require.rb:45:in `require'
ec2-54-228-10-198.eu-west-1.compute.amazonaws.com from /usr/lib64/ruby/gems/1.8/gems/chef-10.24.0/bin/chef-client:23
ec2-54-228-10-198.eu-west-1.compute.amazonaws.com from /usr/bin/chef-client:23:in `load'
ec2-54-228-10-198.eu-west-1.compute.amazonaws.com from /usr/bin/chef-client:23

I tried modifying my bootstrap template (thanks to Steven Danna, of Opscode for providing a CentOS 6 template!) to force the installation of the format gem, but the problem persisted. A quick search online brought up a topic of discussion on the Chef mailing list that seemed to blame the latest release of RubyGems (2.0). The suggested workaround was to downgrade the RubyGems install to the previous release; 1.8.25. To ensure that I would be able to bootstrap machines without a manual intervention, I opened up the relevant template (residing in ~/.rvm/gems/ruby-1.9.3-p385/gems/chef-10.24.0/lib/chef/knife/bootstrap/centos6-gems.erb) and changed line 15 from:

gem update --system

To the following:

gem update --system 1.8.25

This allowed my EC2 instantiation to complete successfully! I'm sure Opscode will release an update to fix this issue shortly, but hopefully this will help a few people in the meantime. Now to debug some outstanding issues with my cookbooks...

Sunday, May 15, 2011

Cloning Windows Vista/7


Disk cloning tools can save hours of effort when upgrading a computer's hard drive, particularly when the drive in question contains an operating system. I recently purchased a new HDD (a Seagate ST31000528AS) for my home desktop to replace the aging (and full!) Seagate used for the Windows 7 installation.

There are plenty of tools available for imaging or cloning disks and partitions, including some excellent open source offerings. CloneZilla, for example, is one that I have used myself to image Windows XP installations for backup purposes. However, searching online revealed that cloning my Windows 7 installation to the new HDD wasn't going to be as easy; it would seem that since Windows Vista, Microsoft has changed the way Windows identifies hard disks and partitions. This prevents the operating system from locating the system partitions where it's installed if you migrate to a new HDD.

Reading various forum and blog posts revealed that cloning a Windows Vista or 7 install to a new drive would complete successfully, but result in a system I would be unable to boot from. Several posts detailed how it was possible to achieve a working system, but either involved editing the registry, using the Windows 7 install media's recovery mode, or a combination of the two.

As I was in a hurry to upgrade the HDD, I didn't want to have to repeat the lengthy cloning process if I was unsuccessful, or end up with an unbootable OS that would need repairing. So I dug further until I found the Seagate Disk Wizard. At first glance, it appears very similar to other cloning/imaging tools; providing a method to create bootable media you can use in the migration process. One major difference though was that you could simply install the software onto the machine in question and start the migration process from your desktop.

I was wary of using the tool at first, as I couldn't see how it could be as efficient as bootable media that carried out the cloning process outside of any installed operating system or software. Searching around I found a forum post that not only confirmed the tool worked, but detailed it's operation too. Essentially, when run from the desktop, Disk Wizard allows you to plan your migration, before rebooting into a small utility that carries out the cloning process.

Suffice to say, before I began this process, I ensured that I had backed up the data on my system to another machine - The specific steps I took were:
  1. Connected the new drive to the 3rd SATA port on the motherboard in my PC.

  2. Booted into Windows and installed Seagate Disk Wizard.

  3. Ran Disk Wizard and started the clone utility.

  4. Carefully selected my source and destination drive.

  5. Opted to manually define the size I wanted the partitions to be on the new drive (even though I eventually just used the default values used by the partition tool!).

  6. Double-checked my settings before finally confirming I wanted to carry out the operation.

  7. My computer then restarted, booting into a very lightweight utility that managed the migration.

  8. After a long wait, the utility finished, prompting me to have my operating system installation media to hand in order to perform a repair of the installed OS.

  9. Powered off the machine.

  10. Disconnected the source disk from the 1st SATA port on the motherboard.

  11. Disconnected the destination drive from the 3rd port and connected it to the 1st.

  12. Powered the machine on. During Windows booting, there was a brief flash of some text relating to Seagate Disk Wizard. I suspect this is where the software updates the registry to use the IDs of the new drive and partition.

  13. Once the log in screen appeared, I was able to successfully log into my account and begin using my PC.

Since performing my upgrade in this way I have found some posts that detail successful migrations using open source tools (CloneZilla, GParted) while researching for this post. So, it appears that a seamless migration may be possible using these tools, but if you are after a quick solution for upgrading your system drive, then DiskWizard is a good option.

Tuesday, October 19, 2010

Triple-Boot MacBook Pro: OS X, Windows 7 and Fedora 13


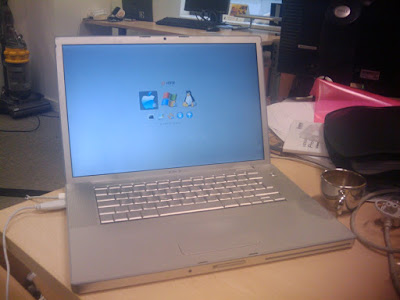
I have finally been able to install (and, more importantly, boot) 3 distinct operating systems on my work laptop; a MacBook Pro 3,3. I have been using my Mac in a dual-boot configuration for several years now; booting between OS X and Fedora. Being able to boot into OS X has allowed me to apply any new firmware released as part of an Apple Software Update, as well as providing a quick-booting OS for basic web browsing (less so now with the advances made in the Fedora distribution and Linux in general).

Having used Windows 7 on my home PC for some time, I decided that this would be the version of Windows that I would endeavour to install on the Mac alongside the other two operating systems. I've found Windows 7 to be a great improvement over Vista and, dare I say it, actually an enjoyable desktop OS to use. Of course, Windows 7 would also allow me to fully partake in any gaming sessions that I happened upon while I had my laptop! However, the most compelling reason to get my Mac triple-booting was to learn more about GPT, EFI and the boot process in general on an EFI-based system.

Obviously, the first step I took was to ensure I had a recent backup of all the important data from my machine, as I would be completely trashing the existing partition table. Once I had done this, I began the installation of the first operating system.

OS X
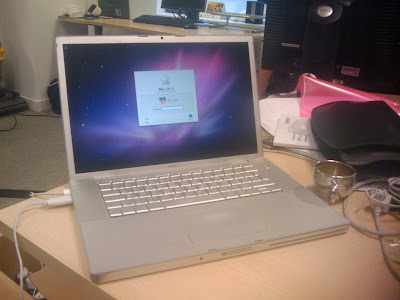

I inserted the Snow Leopard installation DVD into the machine and booted from it. From the installer, I accessed the Disk Utility and created a new GPT partition scheme consisting of 4 partitions (well, technically 5, see below for further details):
  1. OS X: 90GB, HFS+, Journaled and Case-Sensitive

  2. WIN7: 120GB, MSDOS

  3. LINUX: 3GB, MSDOS

  4. LVM: Remaining Space, MSDOS

I then exited Disk Utility and continued with the installation of the operating system, directing the installer to use the "OS X" partition.

Windows 7
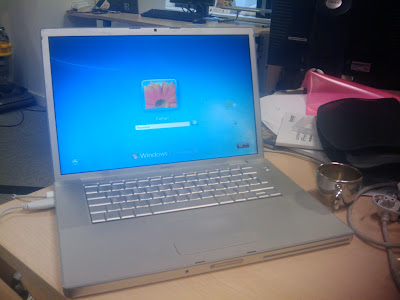

As the laptop uses an Intel Core 2 Duo CPU, I opted to install the 64bit version of Windows 7 Professional. When choosing where to install the operating system, the partitioning tool displayed a rather different view to the OS X Disk Utility; a small FAT partition (used by EFI) was positioned in front of the OS X partition, while some of the drive was marked as unallocated space. I carefully selected the 3rd partition, confirming I had the correct one by looking at it's label (WIN7) and size (approximately 120GB), and formatted it using the "Advanced" features of the partitioning tool. This is a necessary step, as the OS X Disk Utility formats the file system as FAT32 and Windows 7 requires NTFS. After this, I proceeded to select the partition I had just formatted and installed the OS.
During the installation process, the machine had to reboot, which meant I had to ensure that it booted from the Windows 7 partition in order to complete the install. On a Mac, this is accomplished by holding down the "alt" key on the keyboard when the system first boots. It causes a basic boot manager to eventually be displayed, where you can select which of the installed operating systems to boot.

Fedora 13
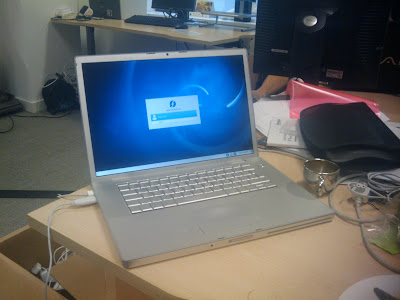

Finally, I booted off the Fedora 13 installation disc (again, opting for the 64bit release). When I was presented with the partitioning tool, I found I had to manually format the 4th partition as ext3 and the 5th partition as an LVM physical volume using the command line. This involved switching to another virtual console, which on a Mac requires you to hold down the "fn" and "alt" keys and press "F2". From here, it is possible to use the mkfs.ext3 and lvm command line tools to format /dev/sda4 partition, create an LVM physical volume on /dev/sda5, a volume group and some volumes.
Again, I had to be wary of choosing the wrong partitions because, as with the Windows 7 installation, the tools displayed a more complicated view of the partition table; the EFI partition and un-partitioned space were visible.
Once I had finished on the command line, I switched back to the graphical installer ("fn", "alt" and "F7") and instructed the partition manager to use /dev/sda4 as the root partition and the newly created LVM volumes for /usr, /tmp, /var, /home and swap. It's important to note that I didn't define a separate /boot partition; this is because I wanted to keep the partition scheme as simple as possible, see below for details.
When the installer reached the stage where you define where GRUB should be installed, I found that the suggested default option was what I needed; /dev/sda4. This is different to a more vanilla install of Fedora, where you would usually install GRUB to the Master Boot Record (MBR); here, there is no MBR to install to as the partition scheme is GPT.

Final Steps

After the Fedora installation completed, I rebooted into OS X (by simply not pressing anything when the machine initially boots) and installed rEFIt. This appears to be the only bootloader that would allow me to boot all three installed operating systems. I had to run the rEFIt partitioning tool before this was possible however; accessible when rEFIt loads at boot-time. This performs the necessary magic that syncs the hybrid GPT/MBR partition table, allowing each OS to boot correctly. I had to perform one final restart of the machine, which is another option in the rEFIt bootloader, and then my triple-boot Mac was complete; apart from all the subsequent OS updates and configuration, of course!

Troubles Encountered and Lessons Learnt

As mentioned previously, this install procedure took me several attempts to get right. I tried using boot camp originally, but soon found that it added unnecessary complexity to the partitioning process. I also found some guides that demonstrated methods for partitioning the disc using the Disk Utility in OS X, but this assumed an existing OS X installation was present on the system. However, as this second approach mentioned the use of Disk Utility, I assumed that using this tool to create the partition scheme for all the operating systems would work; and I was correct!

While on the subject of partitioning, I did end up discovering exactly how the hybrid GPT/MBR partition table works. OS X itself requires a GPT partition scheme; it simply refuses to install to any MBR-style disk. However, Windows requires an MBR partition scheme to boot from and will refuse to install into a partition that it believes resides on a GPT formatted disk.

The hybrid GPT/MBR scheme allows the first 4 partitions of the GPT scheme to be used as an MBR-style disk. However, it is not possible for one of these partitions to be created as an extended partition. On a pure MBR disk, you are restricted to defining 4 primary partitions. One of these can be used to hold further logical partitions, which allows for more complicated partition schemes (i.e. more than 4 partitions).

Because GPT does not allow for extended and logical partitions to be defined, a hybrid implementation limits the MBR scheme to 4 primary partitions. On top of that, because we're booting an EFI based system, there is a hidden FAT32 partition at the beginning of the disk where boot configuration is stored. This brings the total number of MBR partitions available for operating systems to 3; hence why my 2nd, 3rd and 4th partitions are used by OS X, Windows 7 and Fedora's root/boot file systems respectively. Theoretically, it should be possible to install a Linux distribution into higher numbered partitions, however the GRUB boot loader used by Fedora only understands MBR, not GPT. In order to maintain some file system organisation, I created the 5th partition as an LVM logical volume, bringing all the flexibility of resizeable volumes to the Fedora install.

The other major issue encountered was actually booting off the Windows 7 install DVD. I had sourced a copy of Windows 7 Professional 64bit from the Microsoft Partner program site; which resulted in a rather large ISO image being downloaded to my machine. After burning this to DVD and attempting to boot off the disc, I found I was unable to progress past what appeared to be a broken boot menu. There were 2 options, however, both were lacking any explanation as to what it was I would be booting into! On top of that, neither option appeared to want to boot, and I was left with the impression that the system had actually crashed.

I did some research and found that the problem because of the way the image was mastered. Apparently, some important component used in the boot process is not able to handle files that conform to the ISO 9660 standard; specifically, version numbers being appended to the file name.

This made it necessary to re-master the provided image and burn it with some rather specific settings; the most important seemed to be force the omission of the version numbers (see the previously linked blog post for further details). Once I did this, the laptop booted from the disc perfectly.

Overall, I'm very pleased with the fruits of my labour. The real test will be to see if I can replicate the results on another machine.

Thursday, August 5, 2010

Trickle Your Data

Sending large amounts of data out over a consumer DSL connection can completely saturate your upload bandwidth for extended periods. Recently, I scripted the backup of all the data stored on my NSLU2 to Amazon's S3, and initially I had problems accessing other services online while the backup ran.

The simple network setup at home means that traffic shaping at the firewall is difficult, to say the least. As my NSLU2 runs Debian, I was able to throttle the traffic generated by the backup task using an open source application called trickle. It runs in userspace and doesn't require root privileges, allowing you to shape the network traffic of one or more applications. However, there are two caveats to be aware of when attempting to use trickle:
TCP Only

trickle is only able to shape TCP traffic generated by an application.

No Statically Compiled Binaries

trickle works by temporarily replacing the network functionality provided by the underlying operating system. This means that it will only work with applications that are dynamically linked to shared libraries and don't have all their functionality compiled in statically. It is possible to check whether a particular binary is dynamically linked by using the ldd command. So, for example:

alpha:~# ldd /usr/bin/apt-get |grep libc.so
libc.so.6 => /lib/libc.so.6 (0x40280000)
alpha:~#


If the command had not produced any output, it was statically compiled and cannot be used in conjunction with trickle.

Installing trickle on Debian was as easy as typing apt-get install trickle as root. Once installed, you can throttle an application very simply. For example:
trickle -u <upload limit in KB/s> -d <download limit in KB/s> <command>

You can omit either of the two arguments used here, if you just wish to limit the upload or download bandwidth available to an application, and there are further parameters that can be passed to trickle. There is also a trickled daemon that can be used to traffic shape several trickle sessions at a time.

After amending my backup script to make use of trickle, enough upload bandwidth was reserved to allow casual browsing online while it executed.

MySQL: Too Many Open Files

Recently, I experienced an issue with a MySQL instance running on a CentOS 5.4 host whereby applications were unable to contact the daemon. This was despite there being being no network issues and the operating system not reporting any excessive load. Restarting MySQL fixed the issue and allowed the applications to continue working. While investigating the root cause of the problem, I found that the /var/log/mysqld.log file contained the following messages:

100804 4:43:00 [ERROR] /usr/libexec/mysqld: Can't open file: './test_db/test_table.frm' (errno: 24)
100804 4:43:03 [ERROR] Error in accept: Too many open files

In order to prevent the problem occurring again, I increased the maximum number of file descriptors available to MySQL. First, I increased the maximum number of open file descriptors available to the mysql user account by adding the following two lines to the file /etc/security/limits.conf:

mysql soft nofile 8192
mysql hard nofile 8192

Next, I modified the configuration of the MySQL instance to explicitly set the maximum number of open files allowed by simply adding the following line to the /etc/my.cnf file:

open-files-limit=8192

This configuration directive has a default value of 0, which means MySQL will attempt to allocate enough file descriptors itself. However, as I knew exactly how many open files where available to the MySQL user (8192), I could safely use this as the value for open-files-limit.
A restart of MySQL applied the changes and resolved the issue.

Tuesday, April 27, 2010

Ubuntu MySQL Upgrade Issue

I recently had to assist a friend who is hosting sites on an Ubuntu VPS; he found himself unable to connect to local MySQL instance as root.
Obviously, my first suggestion was to simply reset the password using the --skip-grant-tables trick that's well documented elsewhere online. However, attempting to stop the MySQL instance using the command /etc/init.d/mysql stop was not successful. So, after backing up the /var/lib/mysql directory, I began to research the issue a bit further:

  1. Unable to use the init.d script to stop MySQL, I manually stopped the process: killall mysqld

  2. Started the MySQL daemon, ignoring the permissions/grant tables: /usr/bin/mysqld_safe --skip-grant-tables &

  3. Reset the root user's password: UPDATE mysql.user SET Password=PASSWORD('new-password-here') WHERE User='root';

  4. Ran mysqlcheck to look for any corrupted tables (especially in the "mysql" database containing the accounts and permissions) and noticed that errors were being thrown in relation to the "information_schema" database: mysqlcheck --all-databases

  5. Attempted a repair of the "information_schema" database: mysqlcheck --repair information_schema

  6. Ran mysqlcheck again against the "information_schema" database; errors were still produced by the same tables as before.

  7. Restarted mysqld and noticed errors being output in relation to the "debian-sys-maint" user.


This particular error was what helped to identify the root cause of the issue. The server had recently been updated using the apt-get tool and this had included an update to MySQL. Trawling the web unearthed a bug filed on the Ubuntu project bug tracker that suggested that the post-upgrade scripts had not been executed. There is a dedicated MySQL account that exists on a Debian-based system specifically for this (and other DB maintenance) tasks: debian-sys-maint
The credentials for this user can be found in the file /etc/mysql/debian.cnf and should already be present in the MySQL database itself; allowing the system to perform maintenance tasks. Realising this user must be missing from the system, I set about recreating the user:

  1. Logged into MySQL as root and, using the credentials specified in /etc/mysql/debian.cnf, created the "debian-sys-maint" user: GRANT ALL ON *.* TO 'debian-sys-maint'@'localhost' IDENTIFIED BY '';

  2. Now restarting MySQL generated different error messages: Cannot proceed because system tables used by Event Scheduler were found damaged at server start

  3. Knowing that the MySQL package installed on the system had been upgraded recently (and judging by the number of people in similar situations), I forced the execution of the mysql upgrade scripts: mysql_upgrade -u root -p --verbose --force


After these steps were carried out, restarting the MySQL instance occurred without any errors being produced as well as it being possible to authenticate to the system as "root".

Sunday, January 10, 2010

Building an RPM

While attempting to install the Snort IDS and the corresponding logging tool, Barnyard, onto a production x86_64 CentOS 5 server, I found myself in a situation where I would have to produce my own binary RPMs. On the Snort site, there is only an i386 binary RPM and a source RPM for Snort iself, while barnyard was only available as a source tar-ball. The alternatives would have been to compile the software locally and copy the resulting binary files into production, or to compile the applications on the hosts in question. Both of these options presented me with dilemmas:

Installing Development Tools in Production

I'm not happy installing development tools and libraries onto production machines, even temporarily. They can be used by malicious users to compile code, but even "trusted" users may end up abusing them by performing dev tasks or compiling and installing unauthorised software on the machine in question.

Maintenance of Software when Updates/Patches are released

Performing updates of the software, or indeed removing it, is much more difficult when installed from source. I would have to recompile the code on each host the software was running on.


So, instead of compiling the two packages on the servers in question, I opted to build my own binary RPMs that I could easily deploy on the production environment, or any other CentOS 5 instance.
In this article I'll be concentrating on how I built an RPM for Barnyard. There are two reasons for this:

  1. There was only a tar-ball containing the source code available for Barnyard (as opposed to the source RPM for Snort itself). Focusing on the packaging of Barnyard means I'll be able to demonstrate the entire RPM building process.

  2. Compiling Barnyard for a 64-bit environment requires that you apply a patch to the source code before compilation (see below for details). This provides an opportunity to document the ability of the rpmbuild tool to apply patches as part of the packaging process.


A lot of information regarding the RPM building process can be found online; I specifically used The Linux Documentation Project's howto guide, an article on the NetAdminTools site, the RPM site itself and an extremely useful PDF from the Guru Labs site. Even though I found these resources to be extremely useful, I felt I should document the process myself as there was information that I found to be ambiguous and, sometimes, out of date. If there's anything ambiguous about my article, please leave a note in the comments and I'll do my best to clarify!

Building RPMs is not particularly difficult if you are comfortable with compiling from source and working out the relevant dependencies. Because I hadn't installed Snort (or, in fact, any software from source) for a while, I adopted a two VM approach; one VM for testing the compilation and operation of Snort, the other for the RPM build process.

Initial Testing


I could have probably got away with simply using a single VM, but performing the initial compilation and testing on a separate VM meant that my build system was a clean instance of CentOS. As I have and will be working with software I have never used before, a dedicated "testing" VM ensures that I won't compromise a perfectly good RPM building VM, or my host operating system.

After successfully building and testing Barnyard on the test VM, I knew exactly what development packages I required in order to compile the application with the features that I desired:

  • mysql-devel

  • openssl-devel

  • zlib-devel


With these packages installed, building Barnyard with the standard ./configure, make, make install process worked like a charm. However, while testing the application's ability to parse Snort binary logs and insert them into a snort database, the barnyard process kept on dying with the message: Invalid Packet Length.

When searching for a solution initially, all I could find were suggestions that my binary logs had become corrupt. This was unlikely, given I had just installed Snort and Barnyard onto a fresh VM, and further searches revealed that for 64 bit builds, a patch was required in order for correct operation.

After applying the patch to the source code and recompiling, barnyard worked perfectly; reading the binary logs and inserting any alerts into the Snort database. I was now ready to proceed to the actual RPM building stage.

Packaging the Software

I booted my build VM, copied over the source package and 64 bit patch and installed all the relevant development RPMs before taking the following steps to produce the package:

Copy Source and Patch to Appropriate Directory
The directory /usr/src/redhat/SOURCES is used to store the source tar.gz file and any patches you wish to compile. In my case, I copied the barnyard-0.2.0.tar.gz and barnyard.64bit.diff files to the directory.

Create a Spec file
The Spec file defines how an RPM is to be built and should reside in the /usr/src/redhat/SPECS directory. The name of the file should match the format: --.spec - so my spec file was named barnyard-0.2.0-1.spec (the build number "1" references the fact that this is the first attempt at building the package).
The file itself is composed of several sections that describe the operations to be carried out during the build process.
Below is the content of the spec file I created:


Summary: Barnyard output system
Name: barnyard
Version: 0.2.0
Release: 1
License: QPL
Group: IDS
Source: barnyard-0.2.0.tar.gz
Patch: barnyard.64bit.diff
URL: http://dl.snort.org/barnyard/barnyard-0.2.0.tar.gz
Buildroot: %{_tmppath}/%{name}-%{version}-root
Requires: mysql zlib openssl
BuildRequires: mysql-devel zlib-devel openssl-devel

%description
Barnyard is an output system for Snort. Snort creates a special binary output format called unified. Barnyard reads this file, and then resends the data to a database backend. Unlike the database output plug-in, Barnyard manages the sending of events to the database and stores them when the database temporarily cannot accept connections.

%prep
%setup -q
%patch -p1


%build
./configure --prefix=/usr --enable-mysql --with-mysql-includes=/usr/include/mysql --with-mysql-libraries=/usr/lib64/mysql
make RPM_OPT_FLAGS="$RPM_OPT_FLAGS"
%install
%makeinstall

%files
/usr/bin/barnyard

%changelog

* Tue Oct 20 2009 Peter Green
- Initial build.


Most of the entries in the file are self-explanatory (Summary, Name and %description, for example), however, I feel I should elaborate on some:


Group:

This defines the package group that this package should be a member of.

Source:

This entry is fairly self explanatory. However, it's worth mentioning because it's possible to define multiple source packages by using multiple entries and simply appending numbers to each; for example: Patch0:, Patch1:, etc.

Patch:

Another obvious entry; this defines any patches to be applied to the source. Again, like the "Source:" entry, multiple patches can be defined by similarly appending numbers to each.

Buildroot: %{_tmppath}/%{name}-%{version}-root

Defines the location where the compiled software will be installed to before being packaged as an RPM.

Requires:

This lists the software packages required for the software to run. Attempting to install the RPM without this prerequisites present on a system will result in dependency errors. However, package management software like yum can use this requirements to automatically install any dependencies. The actual process of building the RPM will calculate any specific libraries that are required for the software to execute, so it is possible to leave this out. However, dependencies will be defined as particular files, instead of package names.

BuildRequires:

Is similar to the Requires: header, but is used to define dependencies for compiling the software.

%prep

This defines a section; it is typically used to "prepare" the sources (i.e. extracting the source code and applying patches).

%setup -q

This is a macro; it's interpreted by the rpmbuild tool to mean extract the source archive into the /usr/src/redhat/BUILD directory. The -q parameter turns off verbose output for the macro.

%patch -p1

Another macro; this applies the patch defined previously. The -p1 parameter sets the -p parameter passed to the patch command itself.

%build

This defines the start of the stanza where the configuration and compilation of the software take place. Instead of using the explicit configure and make shell commands, it's possible to use %configure and %make macros. However, in this case, I needed to use specific parameters to ensure that barnyard would be built as required.

%install

This stanza is where the software compiled in the %build section is installed into the directory defined using BuildRoot:

%makeinstall

This macro is what accomplishes the installation of the software into the BuildRoot

%files

This stanza lists all the files created by the install process. As you can see, the Barnyard package simply consists of one file: the executable itself. Care should be taken when creating this section of the spec file; listing a directory (/usr/bin, for example) will mean that rpmbuild will package all the files in that directory and the package produced will appear to own the directory in question! Package ownership of directories can be defined using the %dir macro. For example: %dir /etc/barnyard
During the actual RPM building process, I notice that the rpmbuild utility warned me if it detected a file that wasn't included in the %files stanza.

%changelog

This section is for documenting the changes made for each iteration of the build. As this was my first build of Barnyard, there is only one entry.


Generating the RPM


With the rpmbuild command, you can test each stage of the packaging process by passing different arguments to the -b switch. During the process of building the barnyard rpm, I used the following:


rpmbuild -bp /usr/src/redhat/SPECS/barnyard-0.2.0-1.spec

Carries out the %prep stage defined in the spec file; in this case, the source tarball is extracted and the 64bit patch is applied. Using this variation of the command, it was possible for me to ensure that the patch would be applied successfully to the source code.

rpmbuild -bc /usr/src/redhat/SPECS/barnyard-0.2.0-1.spec

Performs the steps defined in the %prep and %build sections. Allowed me to check that the compilation process would work OK.

rpmbuild -bi /usr/src/redhat/SPECS/barnyard-0.2.0-1.spec

Executes the %prep, %build and %install sections of the prep file. Useful, because it allows you to easily see which files are produced by the make install process; simply check under your BuildRoot.

rpmbuild -ba /usr/src/redhat/SPECS/barnyard-0.2.0-1.spec

Produces both source and binary RPMs. There are switches that allow you to produce just the source (-bs) and binary (-bb) separately, if you prefer.

rpmbuild --clean /usr/src/redhat/SPECS/barnyard-0.2.0-1.spec

Cleans up the build tree; useful while testing the software will configure and compile correctly.


Installing the RPM


After I had produced a binary RPM for Barnyard, I copied it over to the production hosts and installed using the rpm utility. The software worked exactly as intended on both hosts and I now had an RPM for future use on other CentOS hosts.

The only one issue I had with the package produced is that it isn't a signed package. My next step will be to set up a GPG key on the build host to allow me to sign packages that I produce!

Sunday, November 22, 2009

GKrellM on MacBook Pro

I used to always install GKrellM on my machines as standard, but due to the number of machines I've been having to update and manage recently (work laptop, personal laptop, personal desktop, etc.) it's simply slipped my mind. That is, until recently...


I was performing some pretty CPU intensive tasks at work on my MacBook Pro (3,1); archiving data using 7zip and producing parity data for the resulting .7z files using PyPar2. I was using the top shell utility to monitor the CPU utilisation, but I fancied something a bit more graphical in nature, so I installed GKrellM. Running Fedora, all I needed to do was open a root terminal and type yum install gkrellm to get the software installed.

While configuring the application, I happened to enable to temperature monitors (out of interest). To my surprise, 10+ sensors were available (see the image to the left)! I'm not sure where each sensor is installed in the system, however, so I'll need to do a bit of digging around online to find out that information. Another nice surprise is that I'm able to monitor fan speed too; they're labelled "left side" and "right side" in the application.

I was pleased that this "just worked", because I've tried monitoring system temperature before on other machines, but it's not been as simple as switching it on in GKrellM. I didn't expect it to be so easy on a Mac!

Once I know more about what the temperature sensors are actually monitoring, I'll update the article!

Thursday, November 19, 2009

mlocate DB Size Problem

I have just had to resolve an issue with the mlocate search tool on a backup server.
The machine is a small (10GB) VM with an iSCSI volume presented to it for data that is backed up. It turns out the mlocate DB had grown to an excessive size (>1GB!) because it had been including this file system in it's nightly DB refresh.
This meant that the /var file system ended up running out of space, which was causing all kinds of problems:

  • The nightly mlocate DB refresh task could not complete.

  • Emails could not be sent as the spool directory for sendmail could not be written to.

  • Log files could not be written to.

  • Performing a system update with yum was not possible.


My solution was to:

  1. Remove all files from the /var/lib/mlocate directory.

  2. Open the mlocate configuration file, /etc/updatedb.conf and edit the PRUNEPATHS directive; adding the backup file system, /srv to the list of paths that are excluded from being indexed.

Friday, October 2, 2009

Microsoft SQL Server 2005 DB Restore Issue

After a database backup that was taken from a Microsoft SQL Server 2000 instance was restored to a SQL Server 2005 instance, I experienced an issue where the name of the user that owned the database previously is prepended to all the table names. Check out the image below of the Object Explorer to see what I mean, it's a restored Confluence database; as you can see, "nconfluenceuser" is part of the table names. Usually, this would be "dbo" (DataBase Owner).


This caused an problem for the Confluence instance that attempted to use the database, because none of the queries performed against the database worked - they all failed with an "table does not exist" error.

To get around this issue, I performed the following steps:

  1. Created a new database in the Object Explorer.

  2. Right-clicked the DB, selected "Tasks", then "Import Data..." - this presented me with the Import and Export wizard.

  3. As I was presented with the wizard's welcome screen, I had to hit "Next" to progress to the "Choose a Data Source" screen. Here you select the data source, server and database to import from. As my restored database was on the local machine, the "Data Source" and "Server Name" fields already had appropriate values; all I had to do was select the database from the drop-down list marked "Database".

  4. Hitting "Next" took me to the "Destination" screen, which was already filled out correctly, because of how I kicked-off the wizard (via the destination database's context menu).

  5. For the next step in the Wizard, I chose the default selection of "Copy data from one or more tables or views" before clicking "Next".

  6. Now for the important bit; the "Select Source Tables and Views" step. Here I had to click the "Select All" button, then edit the "Destination" fields for all the tables; removing all the text prior to the table name. After moving down to the next table, the wizard ensured that the edited destination was correctly formatted. See the below pic for an example:

    These were the only modification I made in this step, I didn't change any of the other options present

  7. I clicked "Next" a couple more times, which allowed me to review the pending transactions, before I clicked "Finish" to finally perform the import; this could take some time, depending on the size of the DB to import and the speed of the machine.

  8. After it had finished and I closed the wizard, I was able to see that the newly created DB no longer had the "nconfluence" username prepended to it, but "dbo"; see the below picture.

  9. My final step was to create a user for Confluence to bind to the database as, granting the account "dbo" privileges over the imported DB.

Thursday, October 1, 2009

OS X Partition Capacity Issue

I ran into a bit of a problem with my dual boot MacBook Pro the other day. I was booted into OS X, and I was prompted by the operating system to install a bunch of system updates that had been released since I last used the OS. When I attempted to download and install them, I was informed that I did not have enough free disk space. This surprised me, as I had installed OS X onto a 20GB partition, and I had not installed any office suite or other large applications; I perform all my work when booted into Fedora, only using OS X for web browsing - checking email, online shopping, BBC iPlayer, You Tube, etc.

I checked my hard disk usage, and it only amounted to just shy of 15GB ; I would have thought this should have been plenty of space to download and extract the updates I had pending. However, as OS X didn't seem to think so, I was stuck. I'm quite concerned with IT security, so you can imagine my dismay at realising I would be unable to keep my operating system up to date!

Monolingual - A Quick Fix

A colleague of mine suggested I try Monolingual - it's an application that allows you to remove unneeded localisation data from your OS X installation, as well as any unnecessary binaries that are compiled for different architectures (Intel, PowerPC, etc.). Unfortunately, I was only able to clear a couple of hundred megabytes of data, so I was still unable to run the system update, which left me with the unenviable task of trying to increase the size of the OS X partition.

Before I continued, I ensured that I had backed up all of my important data off the laptop - messing around with partition tables can leave your machine unusable, not to mention the possibility of accidentally deleting a partition!

Partition Resizing

My next step was to boot from the OS X installation DVD, and attempt to use the Disk Utility to modify the partition table. I had a second HFS+ partition positioned directly after the OS X partition - the idea being that I could use this partition to share files between both operating systems on the disk. The Apple Disk Utility allows you to resize HFS+ partitions, however, I could not shrink the second HFS+ partition without leaving the recovered space after the partition, which then meant I would be unable to reassign it to the first HFS+ partition. This meant that I had to delete the second HFS+ partition, resize the first, and then recreate the second partition in the space remaining.
When I tried this, however, the Disk Utility simply hung while displaying the message "Preparing to delete volume"; I did actually leave it "preparing" for a good hour while I had dinner, but no progress seemed to have been made when I returned, so I cancelled the operation. As the Disk Utility seemed unable to remove the partition, I booted off the Fedora 9 installation DVD into rescue mode and used the GNU parted tool to remove the second HFS+ partition - which worked without complaints. I restarted the machine and booted off the OS X install DVD to try and resize the OS X partition with the Disk Utility, however, this hung as before; displaying the message "Preparing to resize volume".

I could have tried using GNU parted to resize the partition, but this probably wouldn't have worked, so that left me with one more option before I would have to bite the bullet and perform a complete reinstall of both operating systems: I deleted the OS partition using GNU parted, and then attempted to run through the OS X install, creating a new partition in the space available at the beginning of the disk. The Disk Utility, however, refused to create any new partitions on the disk... I was going to have to wipe the disk completely and start from scratch!

Complete Reinstall

After having made the decision to completely reinstall, it was a fairly painless process. However, I look the opportunity to install Fedora 9 instead of Fedora 8.

Once I had my laptop "fully armed and operational" again (well, at least with two operating systems installed), I checked the OS X partition to see just how much space a fresh install of OS X would consume. I was extremely surprised to find that 11GB of valuable hard disk space had been used - this is as much as a fresh install of Vista! Now admittedly, there are probably quite a lot of compatibility libraries to allow Rosetta to work, as well as binaries for the various architectures that OS X supports, but this still seems like a large amount of program data!

Anyway, the moral of this story is to ensure you leave plenty of space for OS X, should you be partitioning your hard drive before installing the operating system. This won't affect most Mac users, just those of you that either partition your disk for whatever purpose.

--

This article originally appeared here.